- Home
- News
- WoW Midnight
- All Dungeon Buffs in WoW Midnight Season 2: Locations, Bonuses and Mythic+ Tips

All Dungeon Buffs in WoW Midnight Season 2: Locations, Bonuses and Mythic+ Tips
Midnight Season 2 introduces several hidden buffs and special interactables inside Mythic+ dungeons. These bonuses are easy to miss, but they can provide valuable defensive stats, offensive power, movement speed, Haste, or temporary combat assistance.
Some buffs require specific professions, while others are tied to a class, race, dungeon route, or a particular mini-boss. Knowing where these bonuses are located can give your group a meaningful advantage, especially when pushing higher Mythic+ keys.
In this guide, we cover the currently documented dungeon buffs in Altar of Fangs, Voidscar Arena, Murder Row, Den of Nalorakk, and The Blinding Vale, including their locations, requirements, effects, duration, and the best way to use them.
Quick Dungeon Buff Overview
| Dungeon | Buff / Item | Effect | Requirement |
|---|---|---|---|
| Altar of Fangs | Mutating Elixir | +3% Versatility | Alchemy 25 or Cooking 25 |
| Voidscar Arena | Proof of Mastery | Increases Mastery | Defeat Raj'kess |
| Voidscar Arena | Proof of Endurance | Increases Versatility | Defeat Aegyra |
| Murder Row | Extra Action Items | Damage, Haste and utility bonuses | Faceted Crystalline Fel |
| Den of Nalorakk | Warding Incense | +5% Versatility | Alchemy 25 or Bear Form Druid |
| Den of Nalorakk | Rune of Anchoring | -50% movement forces | Night Elf, Troll or Bear Form Druid |
| The Blinding Vale | Flourishing Stride | +20% Movement Speed, +5% Haste | Herbalism 25, Paladin or Priest |
| The Blinding Vale | Baby Grovecrawler | Applies stacking damage-taken debuff | Hunter or Druid |
Altar of Fangs Dungeon Buff
Mutating Elixir
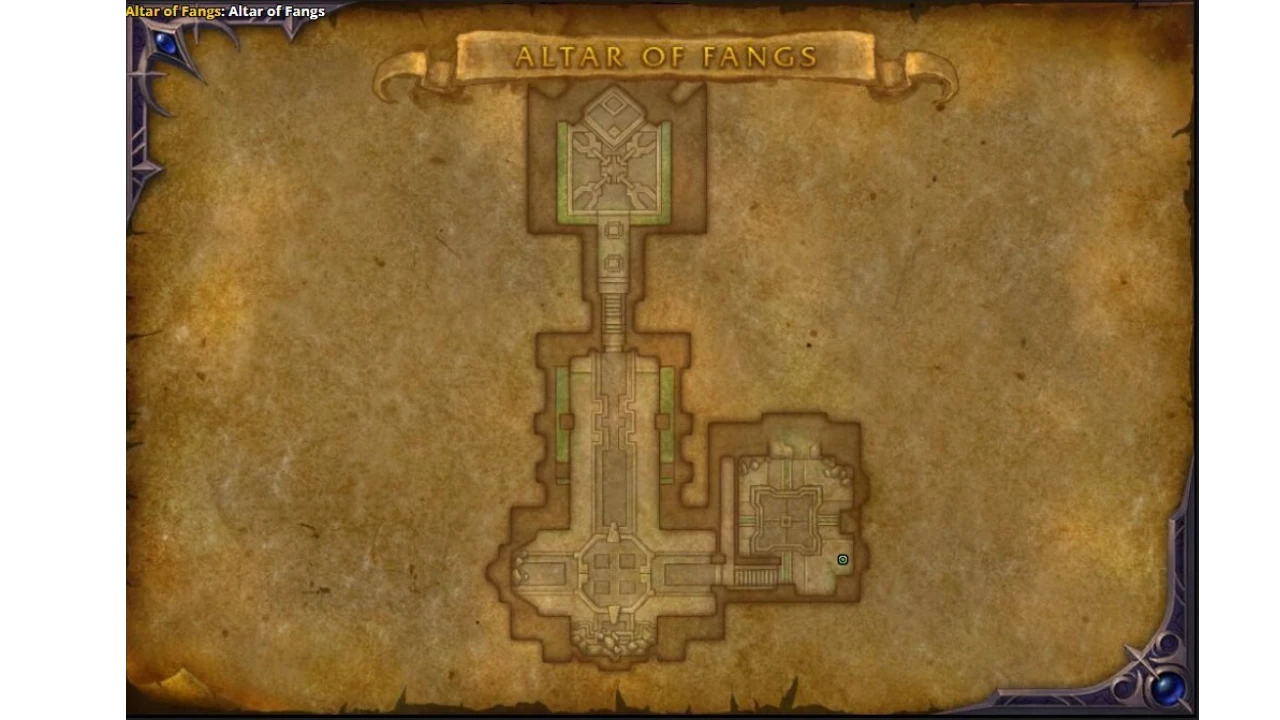
Altar of Fangs contains a powerful party-wide stat buff that can be activated by a player with 25 Skill level in Midnight Alchemy or Midnight Cooking.
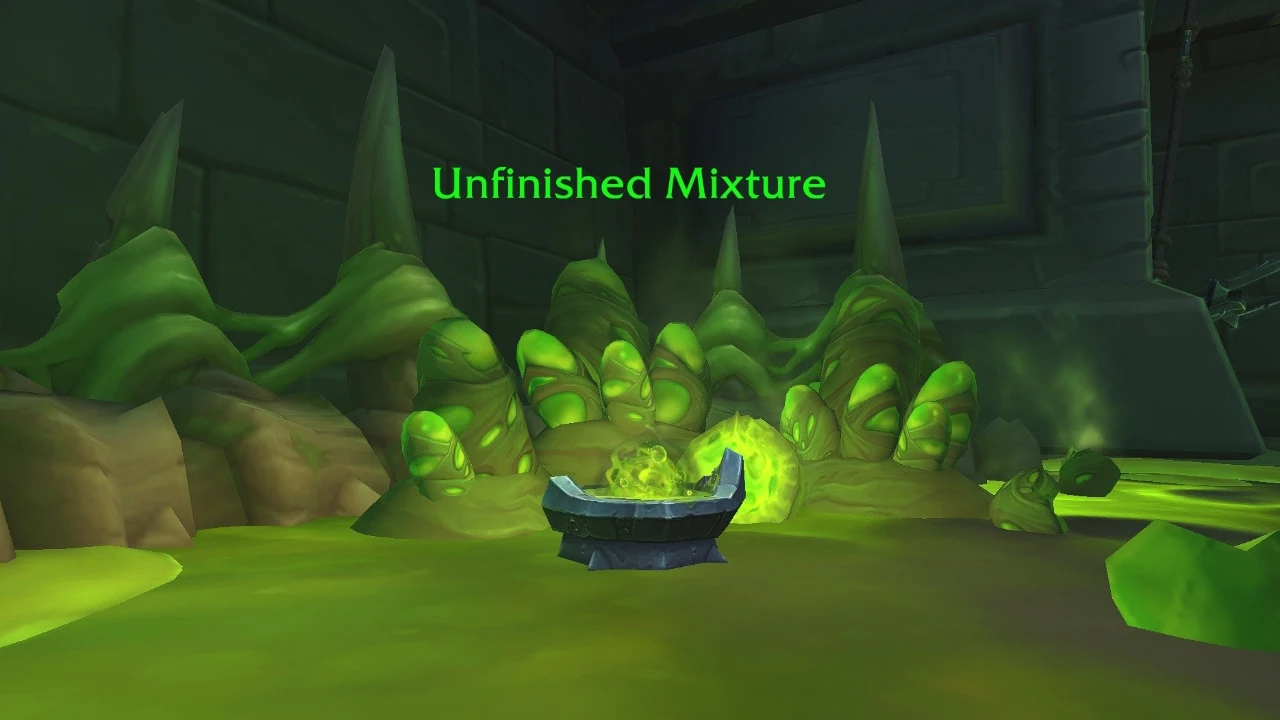
After defeating The Writhing Coil, continue up the stairs toward the required Ascendant Serpent mini-boss. In the upper-left part of this room, you can find an Unfinished Mixture next to several serpent eggs.
A player who meets the profession requirement can interact with the mixture and grant the entire party the Mutating Elixir buff.
| Property | Details |
|---|---|
| Buff | Mutating Elixir |
| Effect | Increases Versatility by 3% |
| Requirement | Midnight Alchemy 25 or Midnight Cooking 25 |
| Duration | Remainder of the dungeon |
| Death | Persists through death |
This is one of the most valuable buffs for longer Altar of Fangs runs because it remains active for the rest of the dungeon. It provides a simple defensive and offensive stat increase without requiring a Druid in the group.
Voidscar Arena Dungeon Buffs
Voidscar Arena uses a different system. Instead of interacting with an object, your group chooses between two paths at the beginning of the dungeon.
Each path leads to a different mini-boss. Defeating that mini-boss grants a party-wide stat buff that lasts for the remainder of the dungeon.
Aegyra the Unyielding — Proof of Endurance
The left-side path leads to Aegyra the Unyielding.
Defeating Aegyra grants Proof of Endurance, increasing the party's Versatility.
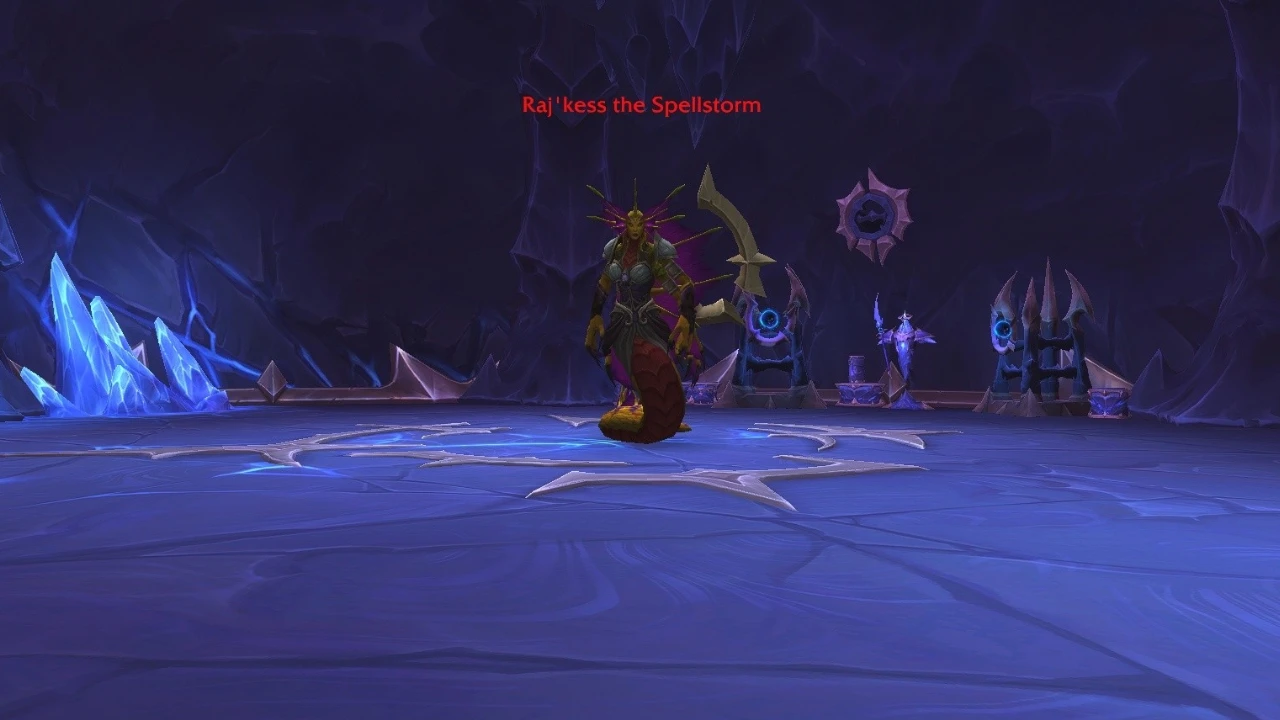
Raj'kess the Spellstorm — Proof of Mastery
The right-side path leads to Raj'kess the Spellstorm.
Defeating Raj'kess grants Proof of Mastery, increasing the party's Mastery.
| Mini-Boss | Path | Buff | Stat |
|---|---|---|---|
| Aegyra the Unyielding | Left | Proof of Endurance | Versatility |
| Raj'kess the Spellstorm | Right | Proof of Mastery | Mastery |
You cannot receive both buffs, so the choice should be based on your group's needs. Mastery generally provides a more offensive benefit, while Versatility provides a more comfortable defensive option.

Murder Row Dungeon Buffs
Murder Row contains one of the most interesting dungeon buff systems in Midnight Season 2. Instead of receiving a single permanent stat buff, players can find a Faceted Crystalline Fel crystal and exchange it with vendors for special Extra Action abilities.
The crystal can be found in the building containing the first Row Snitch on the right side of the dungeon.

Murder Row Extra Action Items
| Vendor | Item | Effect |
|---|---|---|
| Darlia | Heartstop Blade | Reduces the target's maximum health by 30% and stuns it for 6 seconds. Has 3 charges. |
| Feranin | Felwyrm Egg | Summons a fel-infused mana wyrm and increases Haste by 15% for 30 seconds. |
| Vinemaster Suntouched | Suntouched Special Reserve | Increases damage and healing by 2% for 30 seconds. The effect stacks. |
| Sleyin | Concealed Pistol | Deals damage and applies a Bleed. While bleeding, the target takes 20% increased damage. |
Which Murder Row Item Is Best?
The Concealed Pistol provides the strongest group-wide benefit according to the source guide because its Bleed effect causes affected enemies to take 20% increased damage.
Each item can only be purchased once, so the same item cannot be repeatedly stacked. Because the abilities can be used throughout the dungeon, saving the item for an important boss or dangerous trash pack can provide more value than using it immediately.
Den of Nalorakk Dungeon Buffs
Den of Nalorakk contains two major documented buffs. Both can provide useful utility during different sections of the dungeon.
Warding Incense
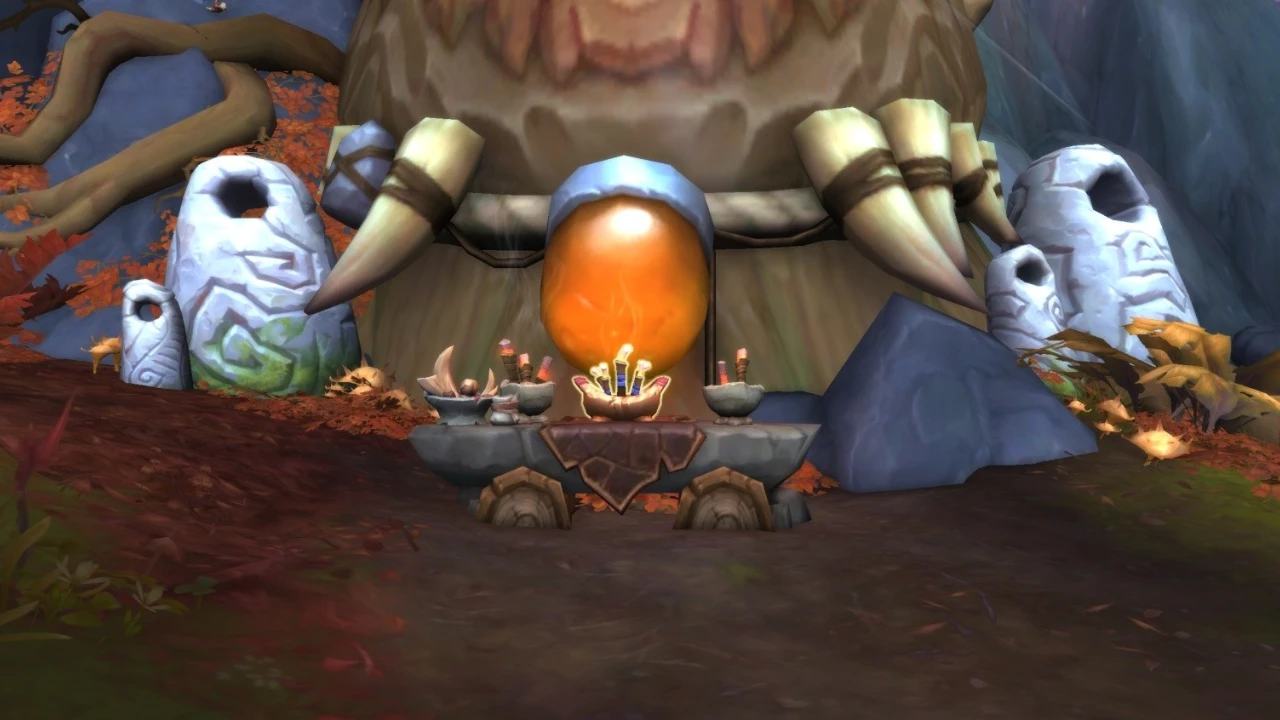
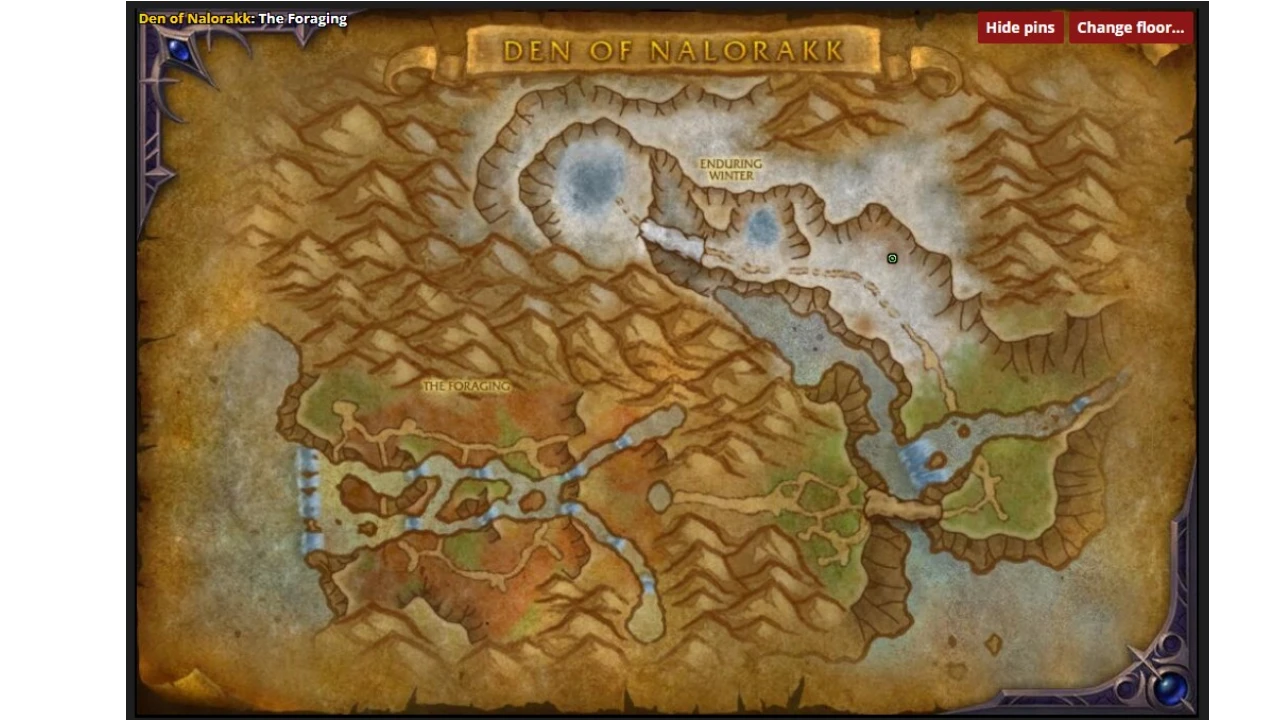
Before the ramp leading toward The Hoardmonger, look to the right side in front of the large bear statue. You can find a Warding Incense.
The incense can be activated by players with 25 Skill level in Midnight Alchemy or by Bear Form Druids.
| Effect | +5% Versatility |
| Duration | 10 minutes |
| Death | Persists through death according to the source guide |
| Requirement | Alchemy 25 or Bear Form Druid |
This makes Warding Incense a useful early-dungeon pickup, especially before the first boss.

Rune of Anchoring
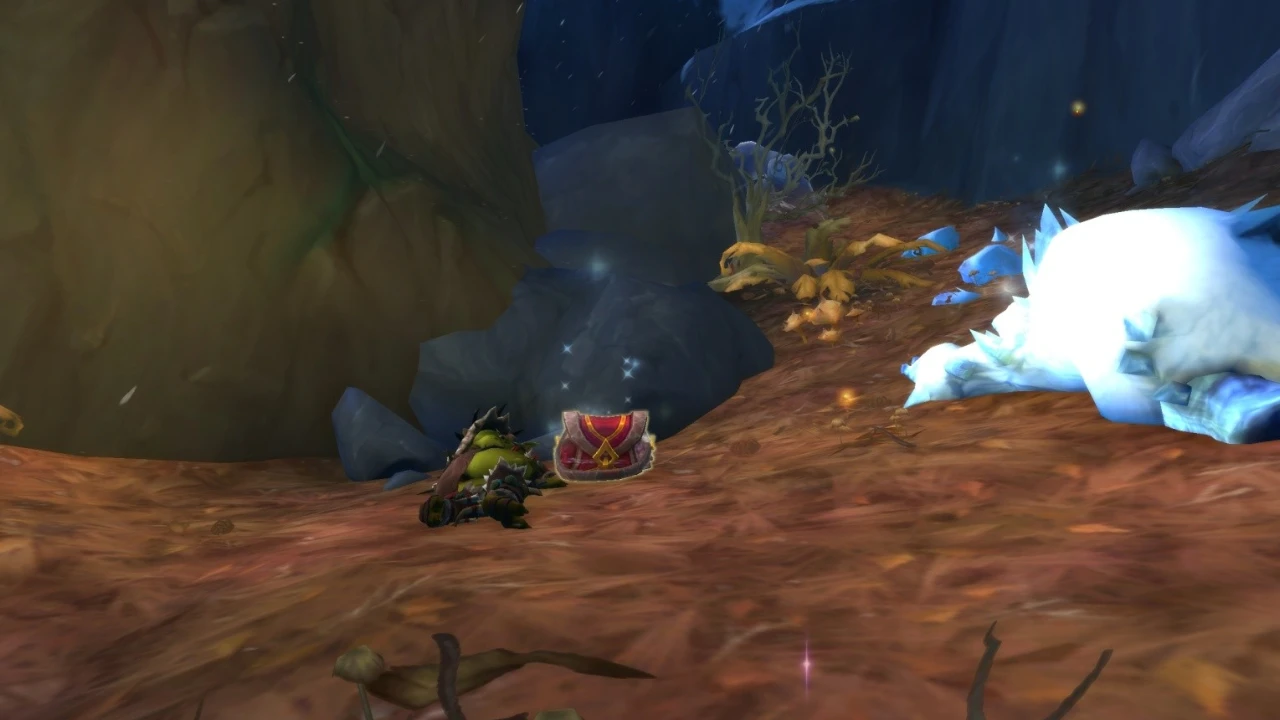
Later in the dungeon, during the Harsh Winds section, players can find a bag of Snowworn Provisions along the right-side path.
Night Elves, Trolls, and Bear Form Druids can interact with the sigil inside the bag to grant the party Rune of Anchoring.
The buff reduces movement forces by 50% for 15 minutes. This is particularly useful against the pushback from Harsh Winds and the Frozen Tempest mechanic during the Sentinel of Winter encounter.
The source article notes that many current Mythic+ routes prefer the left-side path during the Harsh Winds section because it contains less trash and reduces the chance of accidental pulls. The best route, however, depends on the group and Keystone level.
The Blinding Vale Dungeon Buffs
The Blinding Vale offers two different bonuses at the beginning of the dungeon. The important catch is that your group can only access one of them, depending on which route you choose.
Left Route — Flourishing Stride
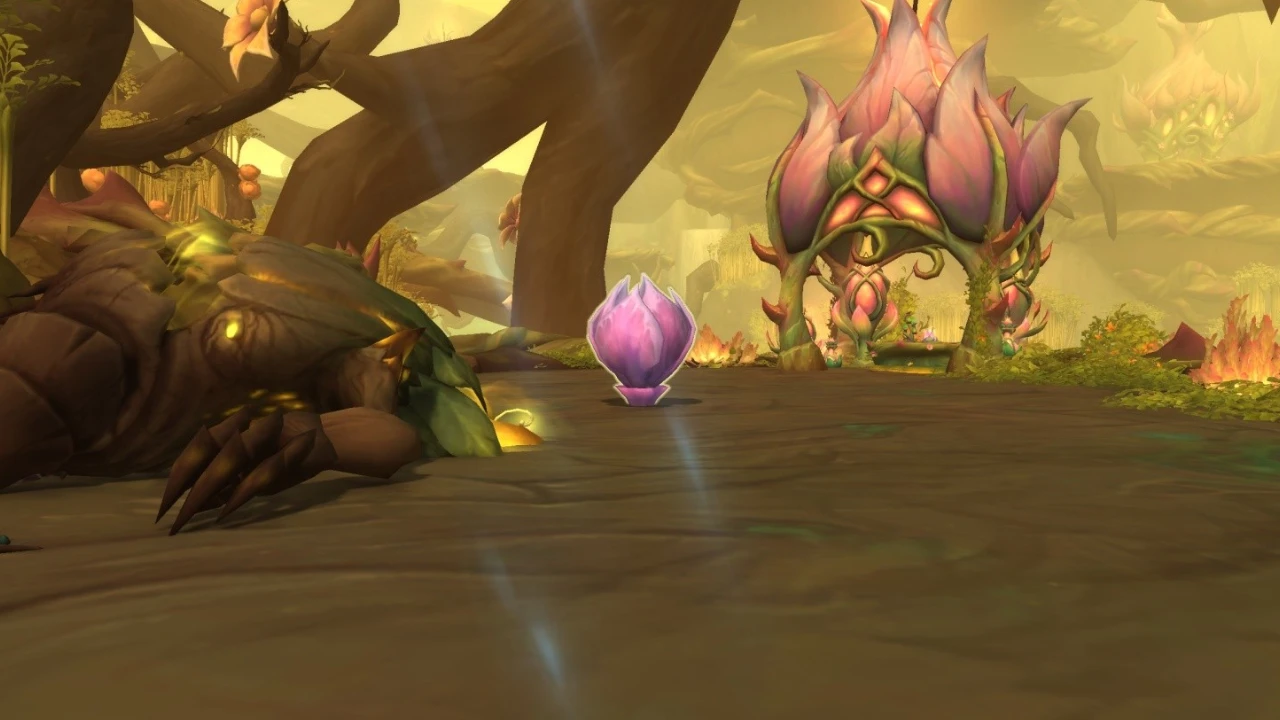
The left-side route leads to a Light-Starved Blossom located on a small outlook shortly before the Lightblossom Trinity boss fight.
The blossom can be activated by players with 25 Skill level in Midnight Herbalism, Paladins, or Priests.
Interacting with the blossom grants Flourishing Stride, increasing movement speed by 20% and Haste by 5% for 2 minutes.

Right Route — Baby Grovecrawler
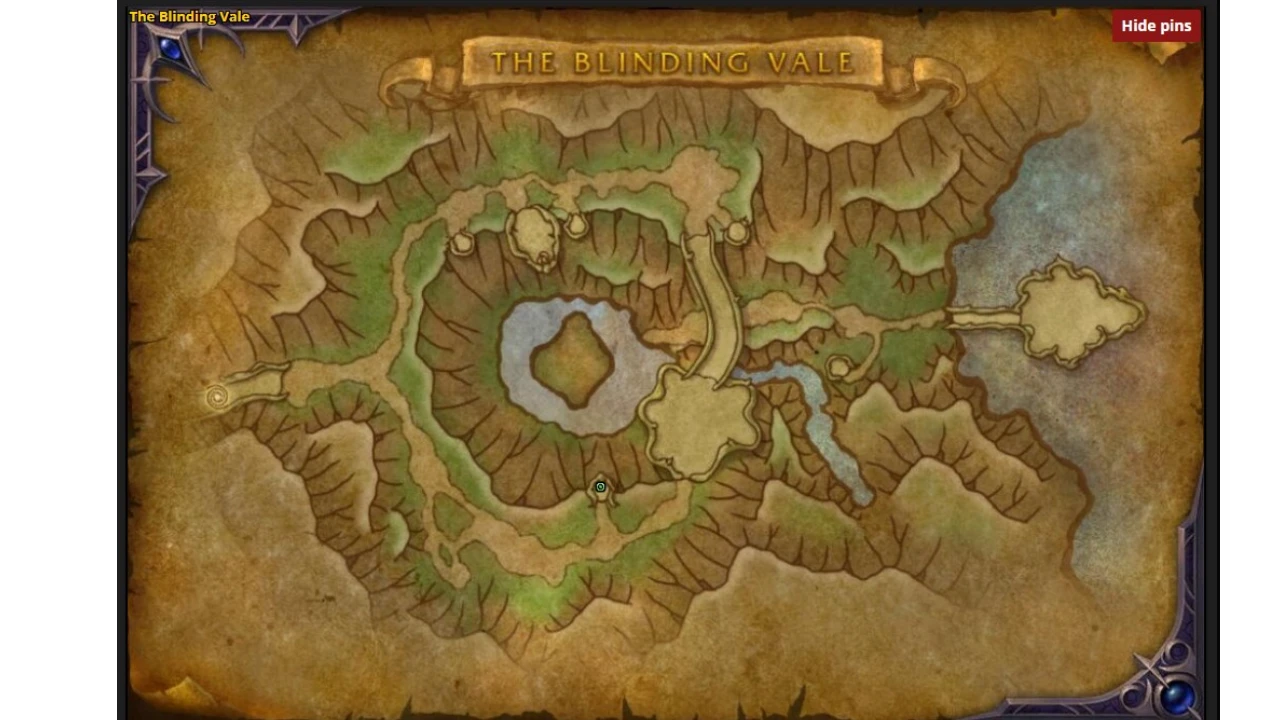
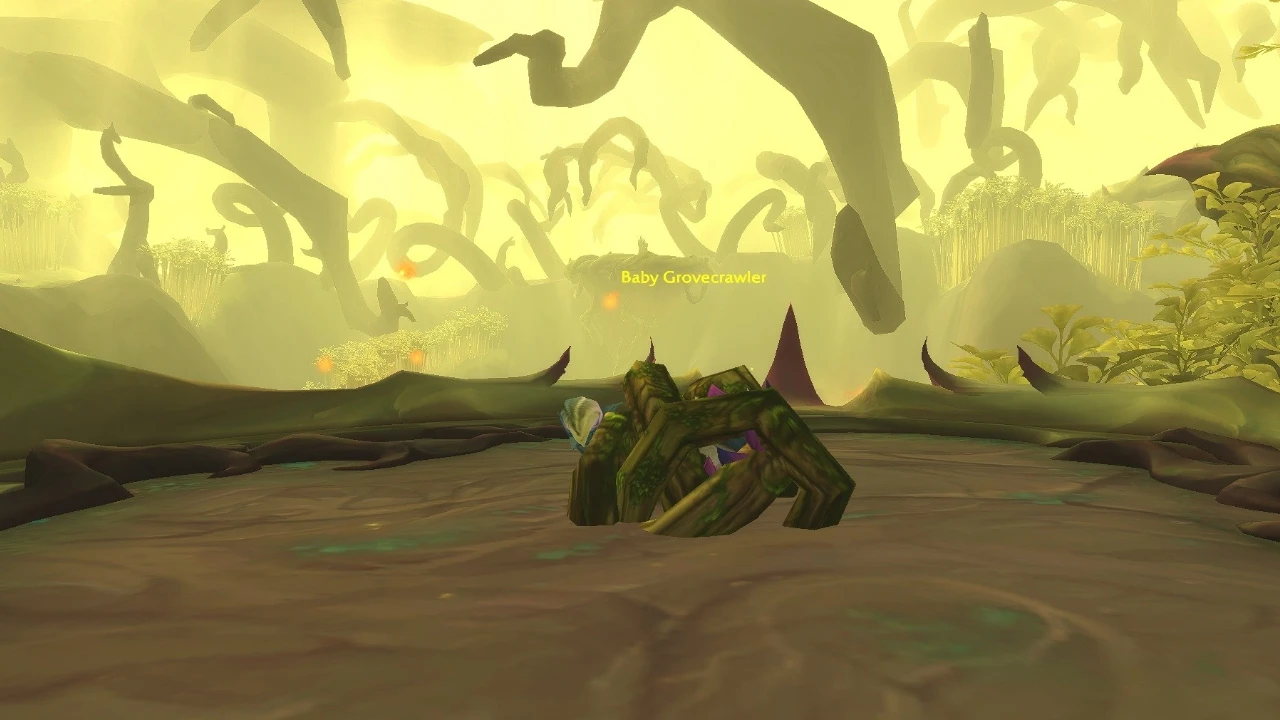
The right-side route leads to a Baby Grovecrawler trapped beneath vines.
Hunters and Druids can free the Grovecrawler, causing it to join the party in combat for approximately one minute.
The Grovecrawler periodically applies Spine Shot to your target. This increases the target's damage taken by 1%, stacking up to 5 times.
Because the Grovecrawler only remains active for a short period, the best timing is to free it immediately before starting the Ikuzz the Light Hunter boss fight.
| Route | Bonus | Requirement | Effect |
|---|---|---|---|
| Left | Flourishing Stride | Herbalism 25 / Paladin / Priest | +20% Movement Speed, +5% Haste for 2 min |
| Right | Baby Grovecrawler | Hunter / Druid | Spine Shot increases target damage taken by up to 5% |
Best Dungeon Buffs for Mythic+
Not every dungeon bonus provides the same level of value. Some are simple stat increases, while others can directly increase your group's damage during an important boss encounter.
| Dungeon | Best Use | Why It Matters |
|---|---|---|
| Altar of Fangs | Mutating Elixir | Permanent dungeon-wide Versatility increase |
| Voidscar Arena | Proof of Mastery | Strong offensive stat option |
| Murder Row | Concealed Pistol | 20% increased damage taken while the target is bleeding |
| Den of Nalorakk | Rune of Anchoring | Greatly reduces dangerous movement forces |
| The Blinding Vale | Baby Grovecrawler | Temporary damage amplification against a boss |
Mythic+ Tips for Using Dungeon Buffs
- Check your group composition before starting. Several buffs require specific professions, classes, or races, so identify who can activate them before the key begins.
- Do not waste temporary buffs. Bonuses such as Flourishing Stride, Felwyrm Egg, and the Baby Grovecrawler have limited durations and should be timed around important pulls.
- Choose the correct Voidscar Arena route. Decide between Mastery and Versatility based on your group's needs rather than taking the route automatically.
- Save Murder Row Extra Action abilities. The Concealed Pistol and other items can be used throughout the dungeon, making them particularly valuable for dangerous trash or bosses.
- Use defensive buffs before difficult sections. Versatility and movement-force reduction can be especially useful on higher keys where one mistake can cost significant time.
- Plan your route around the buff. Some bonuses are tied directly to the route your group takes, so dungeon routing can affect not only trash count but also the utility available to the party.
FAQ
What are dungeon buffs in Midnight Season 2?
Dungeon buffs are special interactables, stat bonuses, or temporary combat abilities hidden inside Midnight Season 2 Mythic+ dungeons. They can provide additional stats, movement speed, Haste, damage amplification, or other utility.
Which Midnight Season 2 dungeons have special buffs?
The documented dungeon buffs covered in this guide are found in Altar of Fangs, Voidscar Arena, Murder Row, Den of Nalorakk, and The Blinding Vale.
Do dungeon buffs require professions?
Some do. Altar of Fangs requires Midnight Alchemy or Midnight Cooking at Skill 25, while several other buffs can be activated by specific classes or races.
Which Voidscar Arena buff should I choose?
Defeating Raj'kess the Spellstorm grants Proof of Mastery, while defeating Aegyra the Unyielding grants Proof of Endurance and increases Versatility. The best choice depends on your group's preferred offensive or defensive stats.
What is the best Murder Row Extra Action item?
The Concealed Pistol is recommended in the source guide because its Bleed effect causes affected enemies to take 20% increased damage.
How long does Mutating Elixir last?
Mutating Elixir lasts for the remainder of the Altar of Fangs dungeon and, according to the source guide, persists through death.
Can I get both Voidscar Arena buffs?
No. The two buffs are tied to different mini-bosses and you cannot receive both during the same run.
What does Rune of Anchoring do?
Rune of Anchoring reduces movement forces by 50% for 15 minutes, helping against the pushback effects found during the Harsh Winds section and the Frozen Tempest mechanic.
What does Baby Grovecrawler do?
Hunters and Druids can free the Baby Grovecrawler in The Blinding Vale. It fights alongside the party for approximately one minute and periodically applies Spine Shot, increasing the target's damage taken by 1%, stacking up to 5 times.