

Marathon Cryo Archive Guide — Everything You Need to Know
Cryo Archive is Marathon's hardest challenge and its best-kept reward. Unlike the other three zones set on Tau Ceti IV, Cryo Archive takes place aboard the UESC Marathon colony ship — specifically the first floor of the ship. It's built like a Destiny 2 raid: a structured endgame experience with tighter mechanics, stronger enemies, and loot you won't find anywhere else in the game. The map arrived after the community spent two full weeks solving an ARG puzzle that unlocked access for everyone — provided they meet the entry requirements.
Entry Requirements
Before you can board the Marathon, you need to clear three conditions:
Your season level — the number in green in the top right corner — must be at least 25. Cryo Archive will be inaccessible until you reach that threshold, just like Outpost requires level 12.
You must establish a connection with all six factions. This means completing each contract that introduces each faction. The final one, Introducing: Sekiguchi, is arguably the most difficult, as it requires heading to Outpost and crossing the UESC-riddled zone while your health constantly drains until you scan yourself in a specific area.
Your loadout must be worth at least 5,000 Credits to enter. If your one weapon isn't valuable enough, check the Armory and your Marathon Schemas for any cheap or free guns you can equip and kit out with attachments to raise their value.
You cannot play Cryo Archive solo. A full team of three Runners is required. You must either have a pre-made team or play with Crew Fill on to fill any free slots.
Map Layout
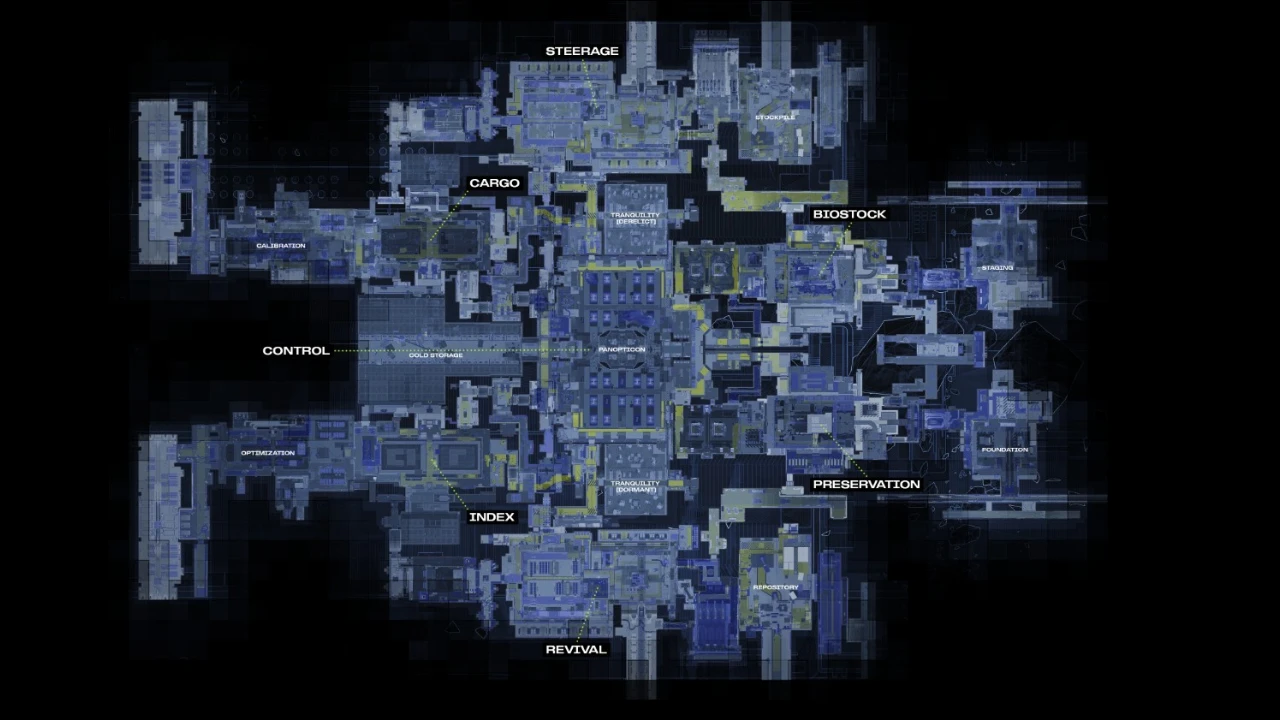
(Image credit: Bungie)
The map is a little bit like a giant bicycle wheel, with Control and Panopticon serving as the central POIs that all the others — Cargo, Steerage, Biostock, Preservation — branch out from. Cryo Archive is one of the most intense and controlled environments in Marathon, featuring a frozen facility-based layout built around tight corridors, sealed sectors, and multi-level interiors.
There are 4 teams per run. Everyone starts in a corner of the map. This peaceful state lasts approximately until you all start moving toward the center, at which point everyone converges into a single glorious meat grinder. The map's design is basically: start spread out, end up on top of each other. Plan accordingly.
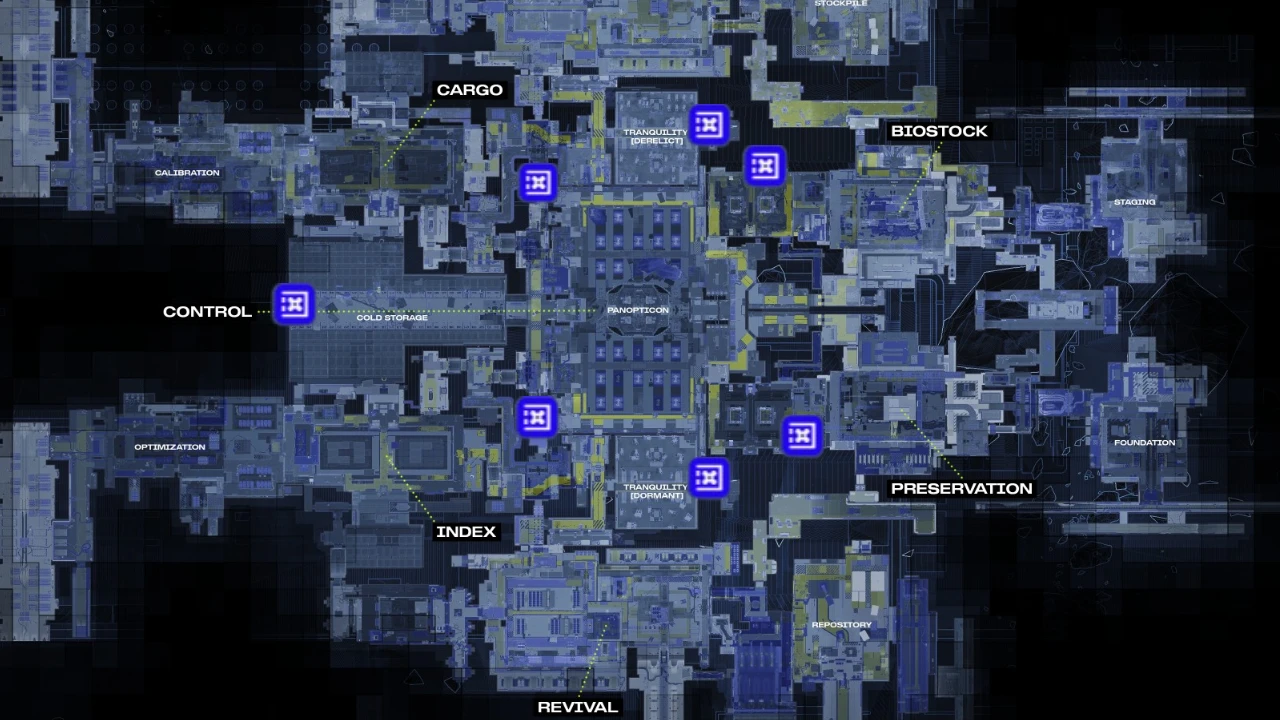
Security Clearance — The Core Mechanic
![]()
(Image credit: Bungie)
Security Clearance is the core mechanic that shapes how Cryo Archive runs play out. There are four clearance levels, each unlocking a different part of the ship. Getting your clearance up is what pushes you closer to Control, the Panopticon, and the Vaults.
Your team's clearance level is tied directly to how many Security Tags you've collectively gathered. Security Tags are small Priority Items found throughout the map. Each new clearance tier requires more tags than the last, starting at three for Level 1. If your team drops tags, your clearance level drops with them — treat them carefully.
How to Earn Security Tags
To increase your Security Clearance level, obtain red Security Tags dropped by UESC enemies and bosses. There are also certain terminals in the map that, when activated, provide a larger increase toward your clearance level.
You will need to acquire 18 points of security to reach Level 3. While you can theoretically do this by slaying UESC robots and activating Security panels, you may find it quicker to hit Level 3 by killing other players and taking their Security Tags.
What Each Level Unlocks
Level 3 is the practical target for most runs. It reveals Batteries for Vault access and opens every door that has a safe behind it. Make it your first objective in every run.
At higher Security Clearance, Scanner terminals will show Battery locations on your map. At Clearance Level 4, Evac terminals start appearing on your map, which makes tracking them down much less of a guessing game.
How to Exfil from Cryo Archive
Extraction here is nothing like the other maps. There are no standard extraction points visible from the start. Understanding how to exfil is the difference between running a successful raid and walking in circles until the run timer kills you.
The full process:
Step 1: Reach Security Clearance Level 3. This is non-negotiable — no clearance, no exfil.
Step 2: Find a Scanner terminal on the wall and scan it to reveal Exfil Station locations briefly on your map. Don't ignore them. Treat every Scanner like it contains the secrets of the universe, because in this map, it kind of does.
Step 3: Find the Exfil Station terminal — marked with an orange icon and black arrow near the central Control area — and interact with it to summon the Secret Exfil.
Step 4: Run. The Secret Exfil spawns at a random edge of the map and you have approximately 3–3.5 minutes to reach it. Only one exfil can be active at a time, so if another team activates before you, you're waiting. The Secret Exfil is visible to other players if they stumble upon it.
There's also a final exfil that triggers automatically when the run timer hits zero. It doesn't appear on the map and works as a true last resort.
Vaults — The Best Loot in the Game
There are six standard Vaults and a hidden seventh that requires more work to reach. Each Vault needs two things: a Cryo Archive key and the completion of a puzzle specific to that Vault.
What You Need to Open a Vault
Get a Marathon Vault Key — these drop on other maps during the week, inside Cryo Archive from enemies, or through CyberAcme contracts. Each key shows its Power and Coolant requirements. Do not sell these. You will regret selling these.
Find Batteries — physical items scattered around the map. At higher Security Clearance, your Scanner terminal will show their locations. You need approximately 8 per vault. Carry them. Do not drop them.
Fill Cryo Coolant containers — take empty containers to the lowest level of the map, Control, where frost effects are visible. Fill them there. Bring both batteries and filled coolant to the Vault door along with your key.
Each Vault contains a puzzle unique to it. High-tier containers, valuable materials, salvage, and gold weapons await behind each completed challenge.
The Compiler — Vault 7 Boss
The Compiler is a special enemy type unique to Cryo Archive, located within the Marathon itself after entering Vault 7. It is only available upon opening Vault 7, which requires all six Subroutine Salvage items from Vaults 1–6, as well as a DNA Access Card — a Superior Key that drops randomly in Cryo Archive runs from Wardens.

(Image credit: Bungie)
The DNA Puzzle
Locate a DNA Network machine in any area of Cryo Archive. Interact with the button on the right to begin printing the DNA sequence, which spawns UESC enemies. Survive for 45 seconds until the printing is complete. Take the item on the left — a DNA Sequence item with four random letters. Note down the four letters.
Take the code to another DNA Network machine and deposit it into the receptacle. Activate 4 buttons around the room in the correct order, where each button displays a letter based on the DNA Sequence item. For example, if your DNA Sequence says ACGT, activate the buttons showing A, C, G, and T in that order. Completing this gives you the Command DNA Vial. After that, you need Security Clearance Level 4 and around 16 batteries to proceed.
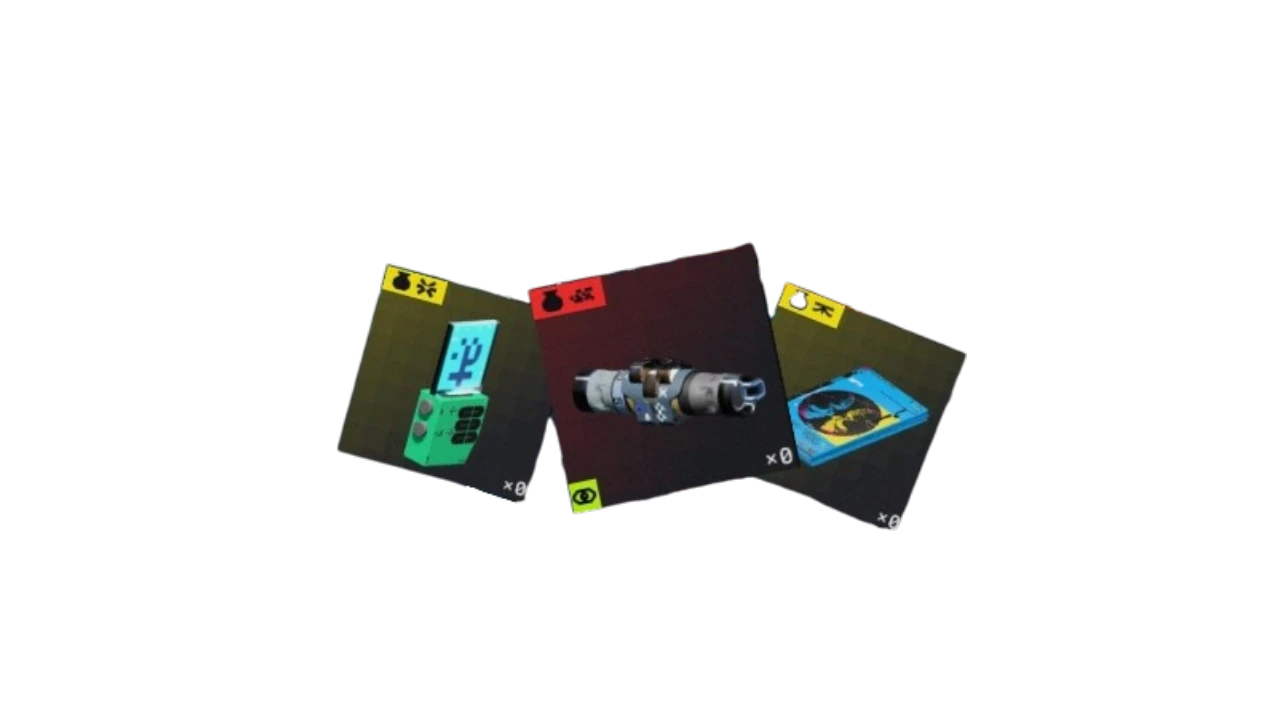
Exclusive Loot — What's Only in Cryo Archive
New Chip Mods
Punishment — The weapon deals significantly increased damage against Compiler combatants. Essential for Vault 7.
Testament — ADSing for a short time increases range and aim assist by a massive amount. Patience becomes power.
Hurricane — While airborne, the weapon has greatly increased stability and reduced accuracy penalty. Rewards vertical movement.
These chip mods can be found anywhere on the map — not locked to Vaults. They turn up in random corners, alcoves, and tucked-away spots in every section of the ship.
New Implants
Covert Recovery — You heal and use heals faster when in smokes.
Freeloader — Destroying an enemy with a knife restores some tactical and prime ability energy.
Panic Response — When low on health, healing grants a Cardio Kick effect, removing heat and decreasing heat gain.
Tips and Tricks
One gun in your loadout is often enough. Keep your second weapon slot empty before heading into a Cryo Archive run so you can loot a gun while you're there — to avoid wasting good guns from your vault.
Pack more than you think you need. Cryo Archive is roughly two standard maps combined, and fights drag. Pack more ammo, heals, and consumables than you think you'll need.
Don't worry about most consumables. Self-Revives and consumables like Cardio Kicks, Mechanic's Kits, and OS Debugs are actually quite common inside Cryo Archive, so loading up your backpack with these before a run isn't essential.
Grenades are powerful here. Cryo Archive consists of a lot of tight corridors, and grenades of any kind can be devastating, quickly turning the tide of a fight between Runner crews.
Reaching Security Clearance Level 3 is your top priority. Don't get distracted by loot or PvP in the opening minutes. Everything else — Vaults, exfil, Vault 7 — requires it.
Never drop Security Tags during a fight. Dropping them lowers your clearance level and can lock you out of areas you've already earned access to.
Use your first run as a learning run. Spend your opening run learning the layout, finding Security Breach terminals, and getting a feel for how exfil works before putting your real gear on the line.
Only one exfil can be active at a time. You may need to wait for another team to exfil before activating the terminal. Don't panic — find a defensive position near the exfil station and wait.
Quick Reference
| Mechanic | Details |
|---|---|
| Availability | Thursday 10 AM PT – Sunday 10 AM PT |
| Team size | 3 Runners required |
| Level requirement | Season Level 25 |
| Entry cost | 5,000 Credit loadout |
| Security Tags for Level 3 | 18 points |
| Exfil window | ~3–3.5 minutes after activation |
| Total Vaults | 7 (6 standard + 1 hidden) |
| Batteries per Vault | ~8 |
| Boss | The Compiler (Vault 7 only) |
POPULAR NEWS


