- Home
- News
- WoW Midnight
- The Voidspire Raid Overview: The First Bastion of Midnight

The Voidspire Raid Overview: The First Bastion of Midnight
Rising from the chaotic heart of the Voidstorm, the Voidspire stands as a dark monument to ancient elven ambition. Originally forged by ancient void elves as a massive conduit to channel cosmic forces, the structure has since succumbed to absolute corruption, twisting the very fabric of reality around it. Today, it is the premier six-boss raid of the Midnight expansion, pulsing with unstable magic and guarding the most powerful secrets of the Void. Navigating this corrupted citadel requires precision and power. For those seeking to overcome these dark trials, a professional The Voidspire raid boost from BuyBoost ensures a seamless run through this lethal gauntlet, securing elite rewards without the struggle of endless wipes.
The Forces Within: Your ascent through the spire will lead to encounters with legendary threats, each more dangerous than the last:
- Imperator Averzian
- Vorasius
- Fallen-King Salhadaar
- Vaelgor and Ezzorak
- The Lightblinded Vanguard
- [Crown of the Cosmos] Alleria Windrunner — The Epic Final Confrontation
The battle for the fate of Azeroth reaches its peak at the summit of the spire. Here, the struggle culminates in a final showdown against Alleria Windrunner, now wielding the power of the Crown of the Cosmos. At this altitude, the spire’s void-fueled energy is fully unleashed, leaving no room for error.
The Voidspire Bosses
There are a total of six The Voidspire bosses, each intricately tied to the corrupted forces occupying the spire and the escalating threat of the Voidstorm. As players climb through the ancient structure, they face powerful leaders, twisted guardians, and cosmic entities drawn into the tower’s malevolent influence. Conquering these encounters requires not only skill but also a dedicated team. For those who want to guarantee their success, a professional The Voidspire raid boost from BuyBoost provides the perfect solution, allowing you to bypass the wipes and head straight to the summit.
Below, we break down each encounter, including their mechanics, lore, and the exclusive loot you can claim.
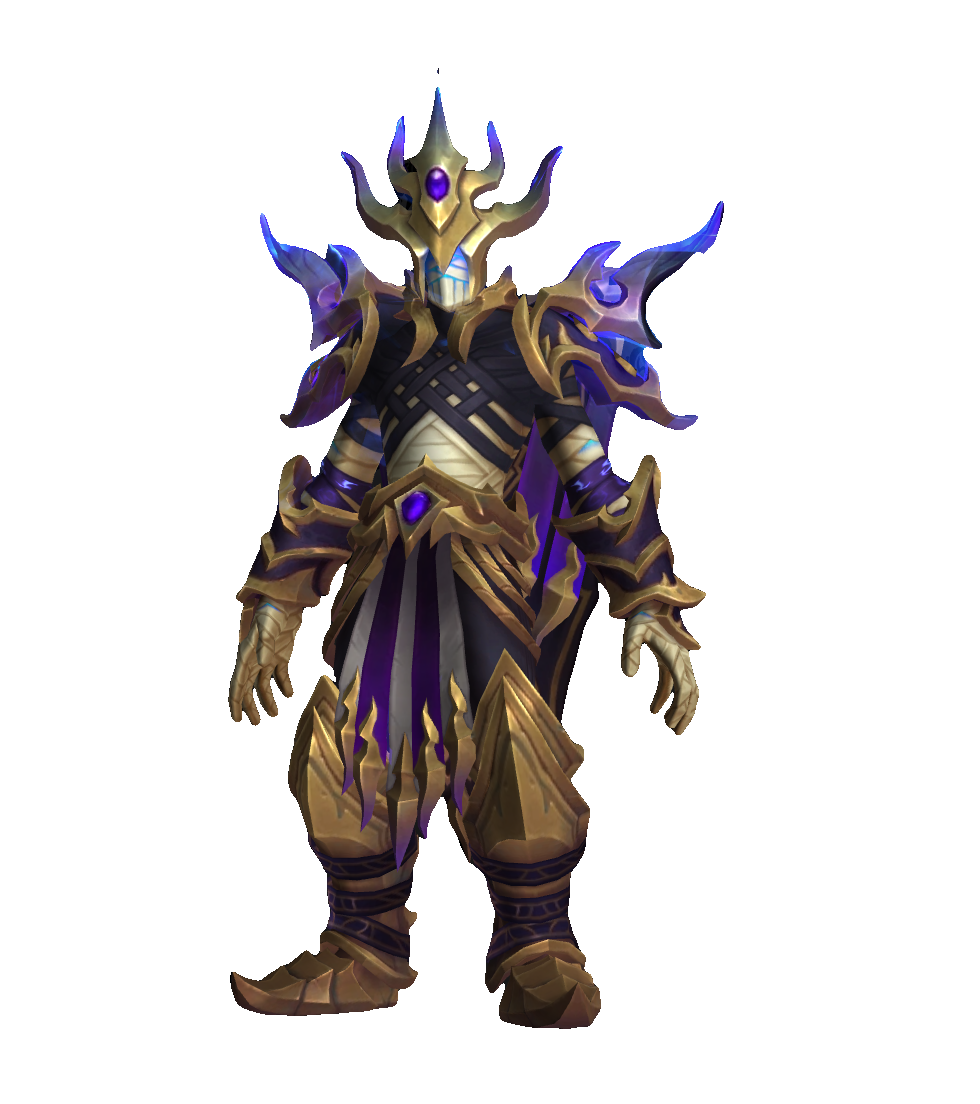
Imperator Averzian
The assault on the spire begins with a direct confrontation against Imperator Averzian, a tyrant who wages a relentless campaign where the only goal is total annihilation. Unlike typical conquerors, Averzian’s entire will is bent toward a singular, catastrophic ambition: to rend the veil between worlds and carve a permanent breach into the Void itself.


Stationed high above the Voidstorm, he stands as the first line of defense for Xal'atath’s interests. Should he succeed in his dark ritual, his infinite host shall pour forth from the wound in reality, drowning all of Azeroth in eternal darkness.
| Ability | Description |
|---|---|
| Shadow's Advance | Averzian summons Abyssal Voidshapers onto the battlefield. As his minions emerge, they inflict Shadow damage to players within 10 yards and knock them away. Territory claimed cannot be retaken. |
| March of the Endless | With three adjacent portals empowering each other, Averzian tears open the void unleashing the endless march, inflicting Shadow damage every second to players in its path. |
| Umbral Collapse | Averzian collapses void energy around his target, inflicting Shadow damage to all players. This damage is reduced by the number of players within 10 yards of the impact location. Soaking prevents territory from being claimed. |
| Dark Tears | Void rifts appear over Averzian-controlled spaces, summoning adds. Adjacent tears empower each other and spawn stronger foes. |
| Abyssal Voidshaper – Gathering Darkness | At full power, the Voidshaper transforms into an Obscurion Endwalker. Must be interrupted or killed before completing the cast. |
| Shadowguard Stalwart – Pitch Bulwark | The caster grants a shield to allies that absorbs substantial damage. Requires interruption to prevent buffing nearby enemies. |
| Dark Upheaval | Averzian harnesses the Void, inflicting Shadow damage to all players. He then continues to radiate energy, dealing damage every second. |
| Umbral Collapse (soak) | Damage is split among players soaking. More players in the impact zone equals less damage per person. |
| Imperator's Glory | Averzian gains increased damage and reduces his damage taken by 99% while within 10 yards of claimed territory. |
| Blackening Wounds | Averzian's melee attacks infect his target with void, reducing their maximum health by 4% for 20 seconds. This effect stacks. |
The primary objective is preventing Averzian from controlling three adjacent territories in any straight line. Each spawn wave brings three adds to different grid positions, accompanied by two Umbral Collapse mechanics. Designate players to soak the two chosen locations and eliminate the enemies within those zones. The third, unssoaked position becomes permanently controlled by Averzian.
Your raid must strategically decide which two adds to engage based on the current territorial map. Avoid creating patterns that allow Averzian easy paths to three-in-a-row alignments. Early phases should prioritize controlling center and corner positions to maintain maneuverability in later cycles. As controlled territory expands, available space contracts and encounter pressure escalates.
Abyssal Voidshapers require top priority; interrupt or eliminate them before Gathering Darkness completes its transformation. Shadowguard Stalwarts demand similar focus to prevent excessive enemy shielding. Tanks must position Averzian away from Dark Tears to minimize his empowerment from Imperator's Glory while rotating defensive cooldowns to manage Blackening Wounds stacks.
Projectiles and displacement mechanics from void portals require evasion as they manifest, especially as battlefield space diminishes. Should Averzian successfully claim three connected territories, March of the Endless triggers and the raid faces overwhelming continuous reinforcement waves. Either defeat him before this alignment materializes or maintain precise territorial control to prevent it.
Loot Table
| Item | Type | Slot |
|---|---|---|
| Imperator's Torment Crystal | Decor | Decor |
| Bulwark of Noble Resolve | Shield | Off Hand |
| Devouring Night's Visage | Leather | Head |
| Endless March Waistwrap | Cloth | Waist |
| Imperator's Banner | Cloak | Back |
| Leggings of the Devouring Advance | Cloth | Legs |
| Light Company Guidon | Trinket | Trinket |
| Light-Judged Spaulders | Plate | Shoulder |
| Light's March Bracers | Plate | Wrist |
| Robes of the Voidbound | Chest | |
| Sabatons of Obscurement | Feet | |
| Sunstrike Rifle | Gun | Ranged |
| Void-Claimed Shinkickers | Leather | Feet |
| Weight of Command | One-Handed Mace | Main Hand |
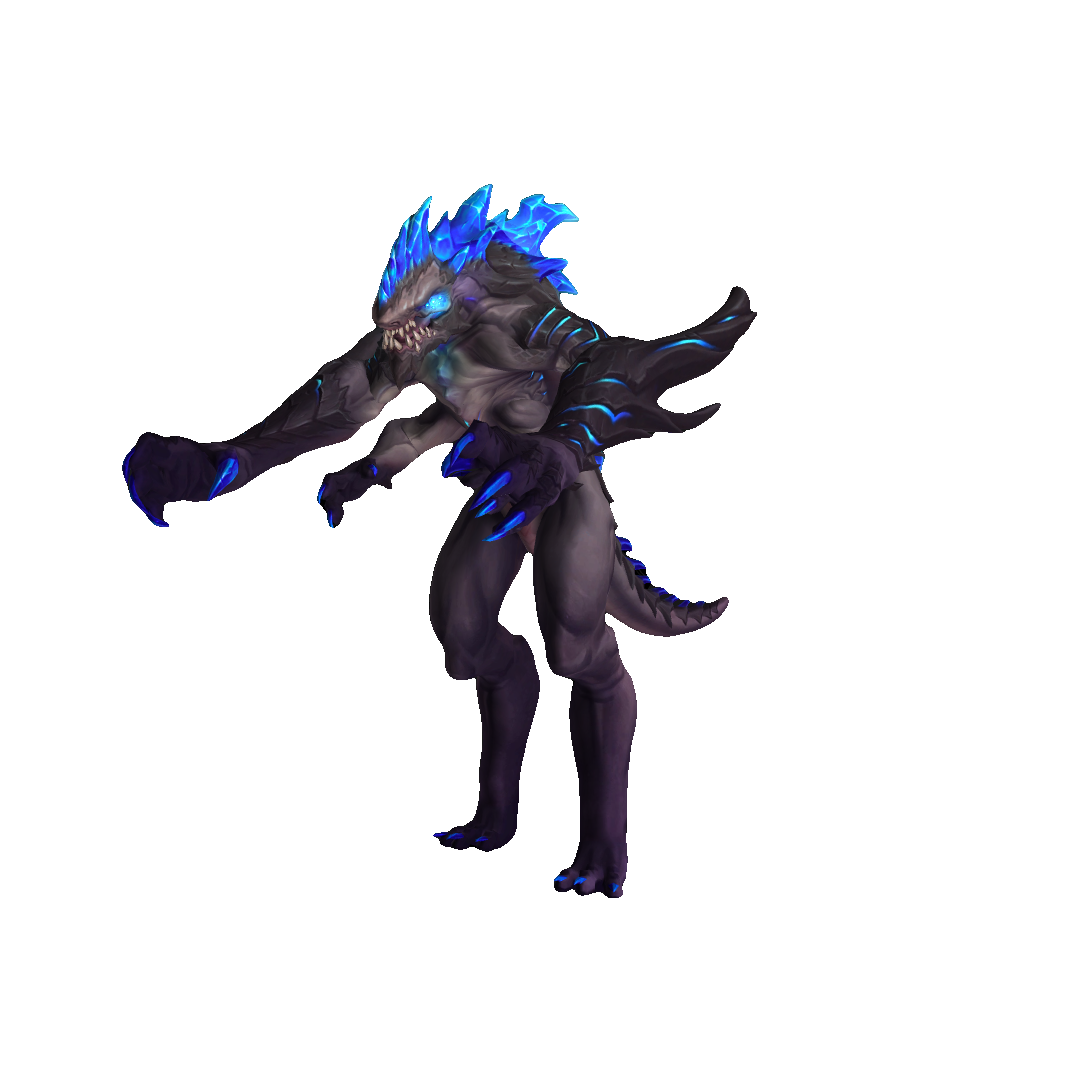
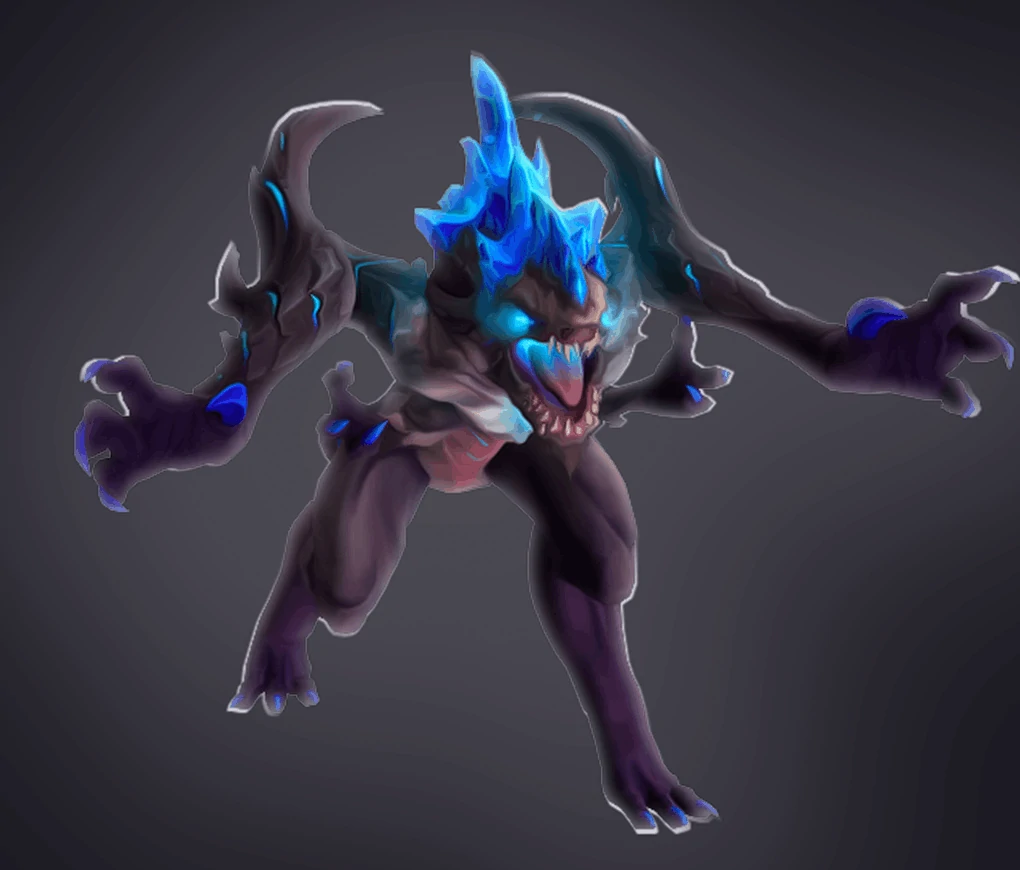
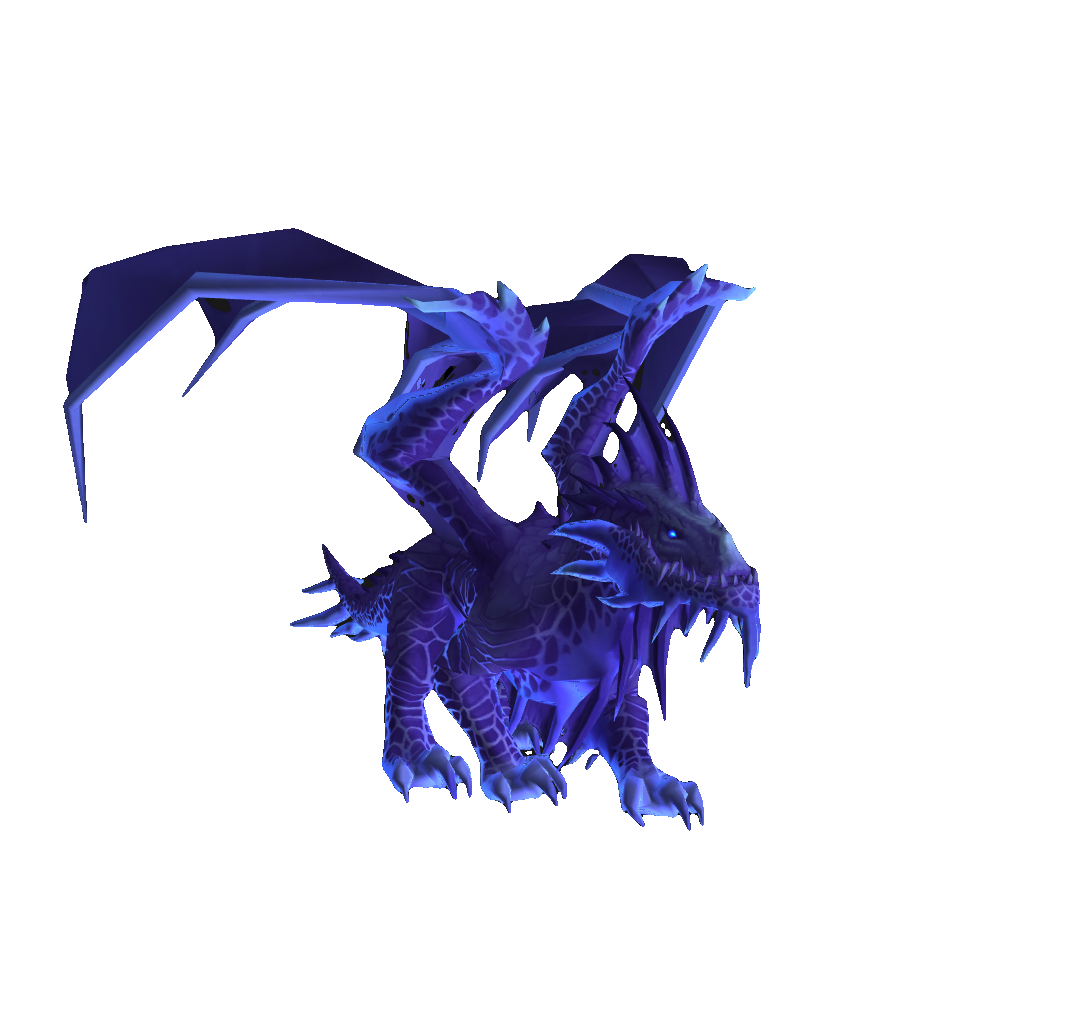
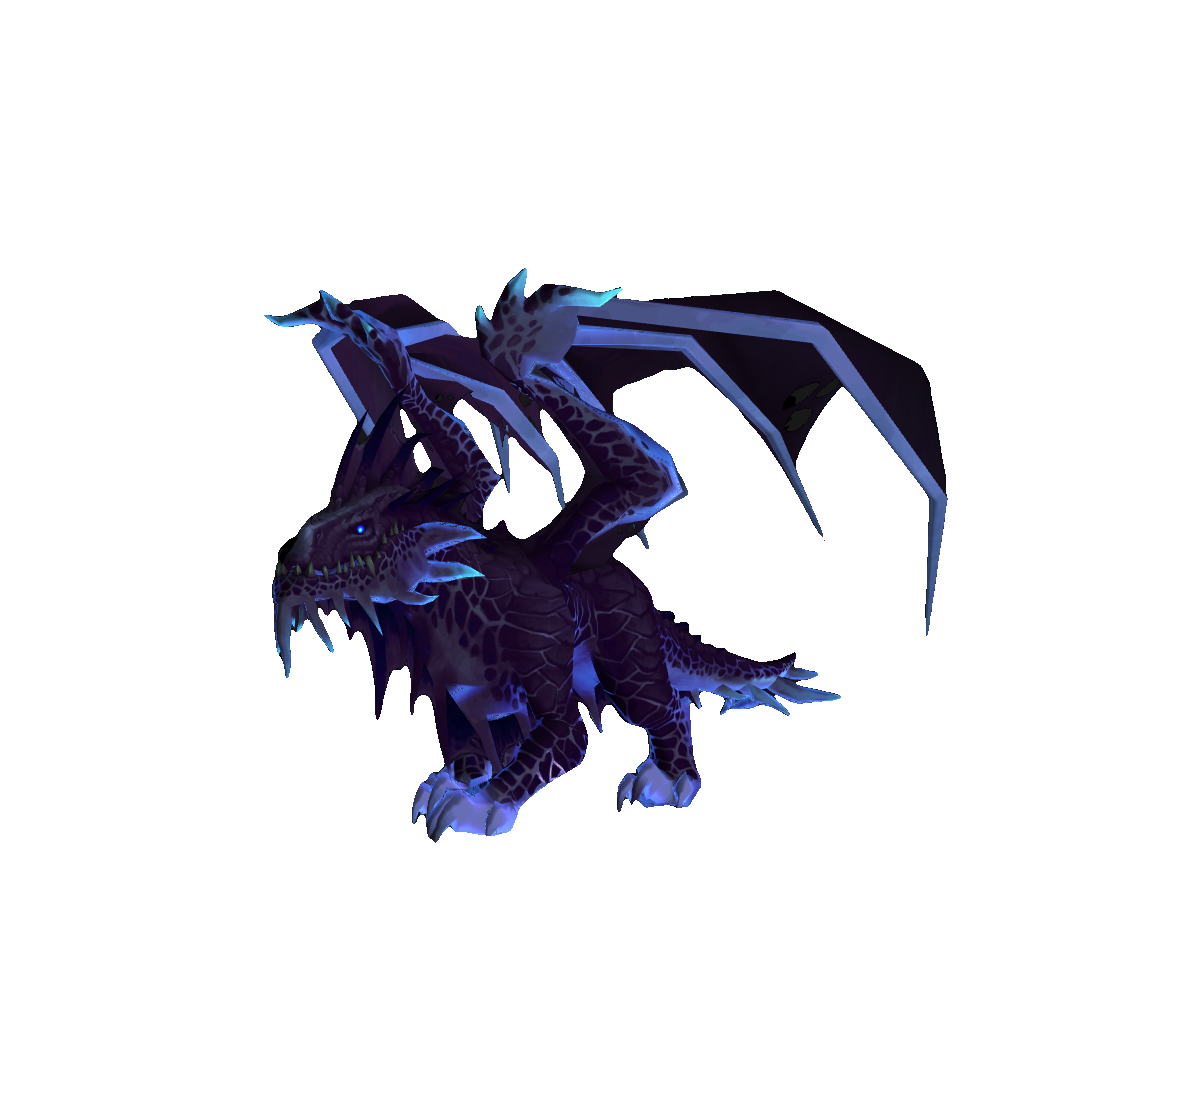
Vorasius
Vorasius is the second boss of The Voidspire raid and the encounter's first true damage benchmark. This massive void-infused predator holds its ground throughout the fight, battering the raid with thunderous claw slams, escalating sonic roars, parasite add waves, and a sweeping void beam that demands full arena control. Success comes down to wall management, add routing, and surviving the mounting pressure of repeated Primordial Roars.
| Ability | Description |
|---|---|
| Smashing Frenzy | Vorasius slams a giant claw into the ground, inflicting heavy Shadowstrike damage to targets in the impact area and moderate damage to all targets. If no targets are present in the impact zone, the impact deals significantly increased damage to the entire raid instead. Applies Smashed to struck targets. |
| Crystaline Eruption | Following the slam, Void Crystals erupt in a line from Vorasius' largest arms, knocking nearby players back. Targets directly impacted are also Smashed. |
| Smashed | Tank debuff — increases incoming Physical damage by 50% for 1 minute. Stacks with each successive slam. Requires focused healing to manage. |
| Void Crystal | Crystal walls created by Crystaline Eruption. Destroyed by Blistercreep death explosions — two per crystal on Heroic, three on Mythic. Must be cleared before Void Breath. |
| Parasite Expulsion | Vorasius sheds parasitic creeps, scattering them across the arena every 2 seconds over 4 seconds, accompanied by excess void shards that deal Shadow damage. |
| Blisterburst | A Blistercreep explodes on death, dealing heavy Shadow damage to all enemies and Void Crystals within 8 yards. Enemies caught in the blast take 100% increased Shadow damage for 30 seconds. Also deals moderate Shadow damage to the entire raid. |
| Primordial Roar | Vorasius draws players inward before unleashing a deafening roar, inflicting Sonic damage to all enemies and knocking them back. Each cast builds a stack of Gathering Void, increasing sustained Shadow damage for the rest of the encounter. |
| Overpowering Pulse | While no enemies are in melee range, Vorasius pulses Shadow damage to all targets every 2 seconds. Melee players must maintain uptime or the raid suffers constant chip damage. |
| Void Breath | A devastating beam of void energy sweeping across the arena, dealing massive initial Shadow damage and continuing to burn targets caught in its path. Requires both crystal walls to be destroyed before it begins — trapped players have no escape route. |
The fight is built around two interlocking systems: wall creation and wall destruction. Tanks absorb Smashing Frenzy regularly, which grows crystal walls via Crystaline Eruption along both sides of the arena. Tanks should alternate slam positions to keep walls predictably placed on opposite flanks, making add routing easier later.
When Parasite Expulsion triggers, Blistercreeps land across the arena and begin moving toward players. Assigned raiders must kite them directly into the crystal walls — killing a Blistercreep within 8 yards of a crystal deals significant damage to it via Blisterburst. Both walls must be fully destroyed before Void Breath begins; any surviving crystal blocks off a safe side and the breath becomes unavoidable for half the raid.
Primordial Roar is the encounter's escalating threat. Each cast adds a stack of Gathering Void, increasing the raid's sustained Shadow intake throughout the fight. Healers should treat the second and third roars as cooldown windows — the damage is manageable early but spikes sharply as stacks accumulate. The pull-in effect before each roar means players need to be loosely spread so the knockback doesn't cluster them into each other.
Vorasius is essentially stationary, giving melee strong uptime, but the Smashing Frenzy frontal must always be covered by a tank. If the slam lands empty, the entire raid takes a punishing damage hit — there is no recovery window built in for this mistake.
The encounter ends with a soft enrage after the third Primordial Roar cycle, when Vorasius begins channeling a lethal kill cast. With clean add routes, properly broken walls, and coordinated healer cooldowns across Roar stacks, this resolves into a straightforward throughput check.
Loot Table
| Item | Type | Slot |
|---|---|---|
| Frenzy's Rebuke | Head | |
| Grimoire of the Eternal Light | Off-Hand | Off Hand |
| Heart of Ancient Hunger | Trinket | Trinket |
| Hungering Victory | Dagger | Main Hand |
| Inescapable Reach | Polearm | Two-Hand |
| Parasite Stompers | Plate | Feet |
| Signet of the Starved Beast | Ring | Finger |
| Void-Skinned Bracers | Leather | Wrist |
| Voidcast Hungering Nullcore | Tier Token | Evoker, Hunter, Shaman |
| Voidcured Hungering Nullcore | Tier Token | Demon Hunter, Druid, Monk, Rogue |
| Voidforged Hungering Nullcore | Tier Token | Death Knight, Paladin, Warrior |
| Voidwoven Hungering Nullcore | Tier Token | Mage, Priest, Warlock |
| Voracious Wristwraps | Cloth | Wrist |
Fallen-King Salhadaar
Fallen-King Salhadaar is the third boss of The Voidspire and a significant step up in complexity. Once a ruler of immense power, he now draws energy directly from the Riftlabs machinery surrounding the arena, steadily charging toward a devastating Cosmic Unraveling. The encounter is built around fast-paced add control, orb management, frequent movement, and healing throughput — all while racing to exploit short burn windows before his energy resets.
| Ability | Description |
|---|---|
| Entropic Unraveling (Passive) | Salhadaar slowly gains energy from the surrounding machinery. At 100 energy he is overwhelmed by the Void, unraveling violently — inflicting periodic Shadow damage to all players while taking 25% increased damage for 20 seconds. Leaves behind Torturous Extract upon expiration. |
| Void Convergence | The Riftlabs produce orbs of Concentrated Void that travel toward Salhadaar. Players touching an orb receive Void Exposure. If an orb reaches Salhadaar, he performs a Void Infusion, dealing massive raid-wide Shadow damage and applying a heavy DoT for 1 minute. On Heroic+, destroyed orbs apply Dark Radiation to all players. |
| Dark Radiation | Applied to all players when a Concentrated Void orb is destroyed. Inflicts Shadow damage every 2 seconds for 8 seconds. Stacks with each subsequent orb destruction. |
| Fractured Projection | Salhadaar manifests several Fractured Images of himself. Each image casts Shadow Fracture, which must be interrupted or controlled — failure deals heavy raid-wide Shadow damage and leaves a Torturous Extract pool. On Mythic, images are shielded by Nexus Shield, requiring interrupts to strip charges. |
| Despotic Command | Aura placed on several players that inflicts Shadow damage to anyone standing within 5 yards. When it expires, the target is shrouded in Oppressive Darkness (a large healing absorb) and spawns a Torturous Extract pool at their location. Must be dispelled carefully away from the raid. |
| Destabilizing Strikes | Tank DoT applied through melee attacks. Inflicts stacking Shadow damage over time — tanks must rotate or manage this carefully as stacks accumulate. |
| Shattering Twilight | Salhadaar hurls a dark star at his current tank target, dealing heavy Shadow damage on impact and causing Twilight Spikes to erupt outward from the hit location. On Heroic+, the star bounces to additional players. Tanks must position away from the raid before each cast. |
| Entropic Unraveling | The active phase triggered at 100 energy. Deals continuous raid-wide Shadow damage while Salhadaar takes 25% increased damage — the primary burn window. Umbral Beams radiate outward during this phase and must be avoided. |
| Twisting Obscurity | A bolt of twisting darkness that chains between all players, inflicting Shadow damage on contact and leaving a persistent DoT on everyone hit. Healers must anticipate the spike. |
The fight revolves entirely around managing Void Convergence orbs, controlling Fractured Image add spawns, and capitalizing on each Entropic Unraveling burn window without collapsing to healing pressure.
When two Concentrated Void orbs appear on opposite sides of the room, DPS must intercept and destroy them before they reach Salhadaar. Letting any orb connect triggers Void Infusion — a combination of immediate burst damage and a 1-minute ramping DoT that can spiral out of control if multiple stacks overlap. However, destroying orbs simultaneously applies multiple stacks of Dark Radiation across the entire raid, so groups should stagger kills: destroy the first orb, wait for its DoT to diminish, then eliminate the second.
Fractured Images spawn alongside the orbs. These adds immediately begin casting Shadow Fracture, which is interruptible with virtually any crowd control. Kill or CC priority should go to the adds first — uninterrupted Shadow Fractures deal heavy raid damage and leave persistent ground hazards that rapidly shrink the safe area of the arena.
Healers face sustained pressure from three directions simultaneously: Despotic Command auras tick damage onto nearby players, Dark Radiation stacks build between each orb cycle, and Twisting Obscurity chains require immediate attention. Players carrying Despotic Command should move to the room's edges before dispel to ensure the resulting Torturous Extract pool doesn't block movement paths. Tanks, meanwhile, must track Destabilizing Strikes stacks and position away from the raid before every Shattering Twilight to prevent bounce damage from clipping the group.
When Salhadaar reaches 100 energy, Entropic Unraveling begins. The raid takes moderate periodic damage throughout, but he takes 25% increased damage — making this the primary DPS window. Raid cooldowns should align here. Umbral Beams radiate outward during the channel and must be dodged. After the phase ends, a Torturous Extract pool remains on the floor and must be accounted for in tank positioning going forward.
The encounter repeats its cycle until Salhadaar falls. In the final stretch, orb spawns become tighter, Dark Radiation stacks accumulate faster, and healers face increasingly severe incoming damage. A clean final Cosmic Unraveling burn — with cooldowns held specifically for it — is typically required to finish the fight before unavoidable damage overwhelms the group.
Loot Table
| Item | Type | Slot |
|---|---|---|
| Banded Domanaar Storage Crate | Housing | — |
| Cosmic Ritual Stone | Neck | Neck |
| Pattern: Sunfire Silk Spellthread | Recipe | — |
| Blade of the Final Twilight | Sword | Main Hand |
| Crown of the Fractured Tyrant | Plate | Head |
| Despotic Raiment | Cloth | Chest |
| Fallen King's Cuffs | Wrist | |
| Ribbon of Coiled Malice | Neck | Neck |
| Tormentor's Bladed Fists | Fist Weapon | Main Hand |
| Twisted Twilight Sash | Leather | Waist |
| Voidcast Unraveled Nullcore | Tier Token | Evoker, Hunter, Shaman |
| Voidcured Unraveled Nullcore | Tier Token | Demon Hunter, Druid, Monk, Rogue |
| Voidforged Unraveled Nullcore | Tier Token | Death Knight, Paladin, Warrior |
| Voidwoven Unraveled Nullcore | Tier Token | Mage, Priest, Warlock |
| Volatile Void Suffuser | Trinket | Trinket |
| Wraps of Cosmic Madness | Trinket | Trinket |
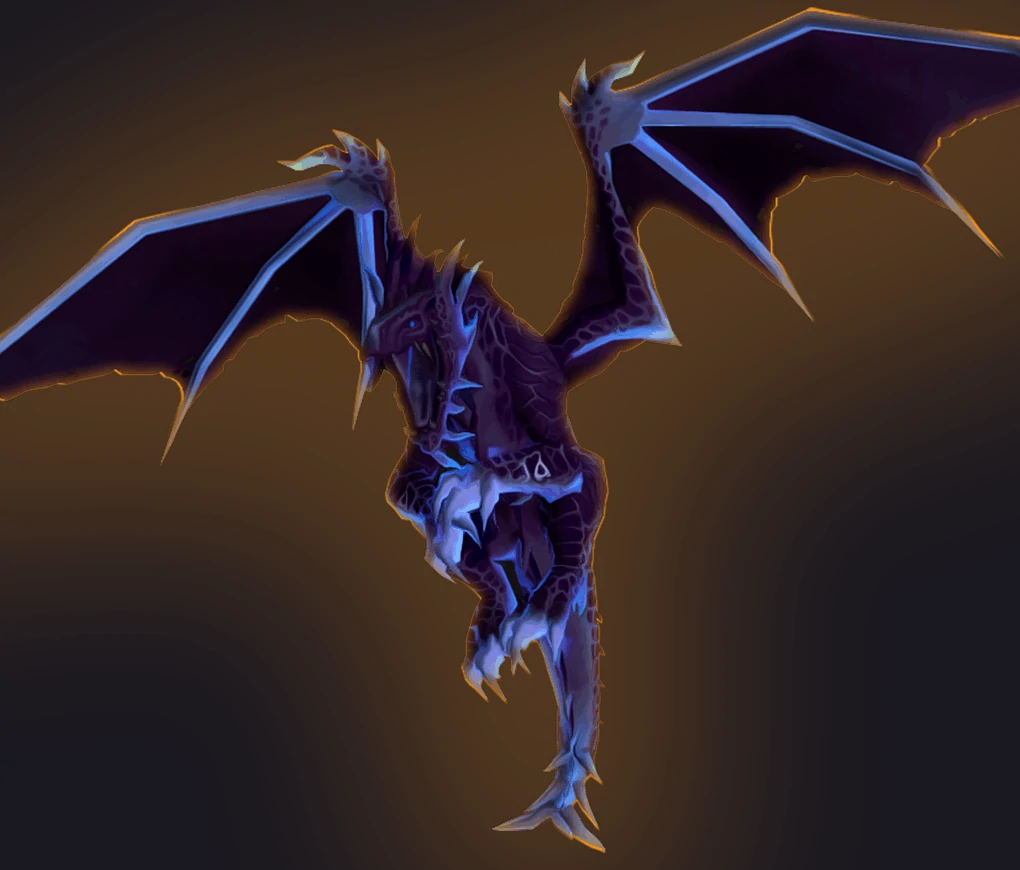
Vaelgor & Ezzorak
Vaelgor and Ezzorak are twin draconic siblings encountered together in The Voidspire — a two-target fight that blends aerial bombardment, ground cleaves, void zone management, and strict HP balancing. The pair alternate between grounded and airborne phases, each punctuated by a shared Midnight Flames cast that forces the entire raid to shelter inside a Lightbound Vanguard barrier. Both dragons must die nearly simultaneously, or the survivor enters a lethal rage.
| Ability | Description |
|---|---|
| Gloom | Ezzorak ejects a moving mass of pure darkness in a frontal direction. Upon arrival it deals Shadow damage to all players and creates a persistent Gloomfield. Damage and field size both decrease up to 7 times as players make contact, each application granting Gloomtouched. |
| Gloomtouched | Applied on Gloom contact — inflicts a Shadow DoT to players within range of the afflicted target. Stacks. On Heroic+, removal applies Diminish, massively increasing Gloomtouched damage taken. Players who soak one Gloom cannot soak the next. |
| Gloomfield | A persistent 2.5-minute void zone left behind by Gloom. Deals Shadow damage every 0.5 sec and reduces movement speed by 75%. Overlapping fields rapidly consume safe space. |
| Nullbeam | Vaelgor expels crystalline spacetime in a frontal direction over 4 seconds, stacking Physical/Shadow damage on hit targets. Upon completion the lattice shatters, forming a Nullzone that tethers all players and pulls inward. Nullzone pull strength weakens with each stack of Nullbeam, up to 12 times. |
| Nullzone | An unstable rift that tethers and steadily pulls players inward, dealing Shadow damage every second. Stretching the tether 10+ yards beyond its initial radius triggers a Nullsnap. If no other tethered players remain, it instead collapses into a Nullzone Implosion. |
| Nullsnap | The cosmic tether shatters, inflicting raid-wide Shadow damage. |
| Nullzone Implosion | The field collapses entirely, dealing a large initial Shadow hit followed by a severe DoT ticking every 0.5 sec for 9 seconds to all players. |
| Dread Breath | Vaelgor roars toward a targeted player, creating a massive frontal fear cone. Players caught take heavy Shadow damage, gain 50% increased movement speed, and are feared for 21 seconds. On Mythic, the movement speed component amplifies the chaos. |
| Void Howl | Ezzorak wreathes all players in shadow and summons a Voidorb at each player's location. Each orb repeatedly casts the interruptible Voidbolt, dealing Shadow damage and applying a stacking DoT. |
| Rakfang | Ezzorak's tank combo — strikes the primary target for Physical and Shadow damage, then empowers his melee attacks to absorb healing. Stacks until a new target is struck. Immediately followed by Impale, a rear-cone bleed and stun. |
| Vaelwing | Vaelgor's tank combo — knocks his primary target away and empowers melee attacks with bonus Shadow damage. Stacks until a new target is struck. Followed by Tail Lash, a rear-cone knockback and bleed. |
| Midnight Flames | At 100 energy, both dragons fly together and unleash devastating Shadow damage to all players, plus a persistent heavy DoT for 25 seconds. Significantly reduced by Radiant Barrier. |
| Radiant Barrier | The Lightbound Vanguard channel holy power for 9 seconds, granting nearby players an absorb shield against Midnight Flames damage. The absorb strength scales with how many Vanguard members are present. Players must stack inside the barrier during each Midnight Flames cast. |
| Twilight Bond | A shared link between the siblings — if their HP diverges by 10% or more, or they stand within 15 yards of each other, both deal 100% increased damage. If one dies, the survivor gains stacking Twilight Fury, rapidly enraging. |
The encounter opens with both dragons active simultaneously. Raid DPS must be carefully balanced between Vaelgor and Ezzorak — Twilight Bond punishes any group that lets the siblings drift beyond a 10% HP difference by doubling their outgoing damage. Cleave specs thrive here, but every group must actively monitor boss frames and redirect when needed.
Ezzorak's Gloom orbs travel across the arena and must be intercepted by designated soakers. Each soak applies Gloomtouched and shrinks the orb's eventual Gloomfield, reducing how much floor space it consumes. Two alternating soak teams are essential — a player with an active Gloomtouched stack cannot safely intercept the next orb. Gloom orbs that land untouched create full-size Gloomfields that rapidly chain with existing pools, severing movement corridors across the arena.
Vaelgor's Nullbeam fires into the current tank's position, then spawns a Nullzone that tethers all players and pulls toward the center. The pull force weakens with each Nullbeam stack on the tank, so clean tank play across multiple casts reduces the tether pressure on the entire raid. Players stretching their tether too far trigger a Nullsnap — manageable — but if only one tethered player remains, the zone collapses into a Nullzone Implosion, a devastating raid-wide bleed.
Dread Breath targets a random player with a wide tracking fear cone. The targeted player should move toward the room's edges or toward Vaelgor's flank while the rest of the raid clears the path. Void Howl spawns Voidorbs at every player's location — these must be silenced or interrupted immediately, as stacking Voidbolt casts compound quickly if ignored.
Intermission — Midnight Flames: When both dragons reach full energy, they take flight and begin their joint breath. The Lightbound Vanguard activate Radiant Barrier in the center of the arena. The entire raid must collapse inside the barrier's range to absorb the incoming damage. Two players will carry debuffs that deal proximity damage — they should stand at the outer edge of the shield rather than the center to avoid spreading ticks into the stack. Any large adds that spawn during the intermission must be killed before the dragons land.
Phase 2 resumes the same rotation but at accelerated pace — Gloom orbs spawn more frequently, Nullzone tethers become harder to manage, and Voidorbs appear in tighter windows. Gloom placement becomes the primary positioning constraint: steer every orb away from existing Gloomfields to prevent chain detonations that wall off safe zones.
The encounter resolves in a coordinated final burn. Both dragons must be brought down within seconds of each other — if one reaches a lethal threshold while the other still has significant health remaining, the surviving sibling's Twilight Fury stacks will overwhelm the raid before it can finish. Save cooldowns for the last Radiant Barrier cycle or the final grounded phase, depending on how much healing the group needs to survive the closing stretch.
Loot Table
| Item | Type | Slot |
|---|---|---|
| Voidbound Holding Cell | Housing | — |
| Clutchmates' Caress | Trinket | Trinket |
| Draconic Nullcape | Cloth | Back |
| Emblazoned Sunglaive | Glaive | Two-Hand |
| Ezzorak's Gloombind | Waist | |
| Gloom-Spattered Dreadscale | Plate | Chest |
| Nullwalker's Dread Epaulettes | Leather | Shoulder |
| Slippers of the Midnight Flame | Cloth | Feet |
| Vaelgor's Fearsome Grasp | Fist Weapon | Main Hand |
| Vaelgor's Final Stare | Trinket | Trinket |
| Voidcast Corrupted Nullcore | Tier Token | Evoker, Hunter, Shaman |
| Voidcured Corrupted Nullcore | Tier Token | Demon Hunter, Druid, Monk, Rogue |
| Voidforged Corrupted Nullcore | Tier Token | Death Knight, Paladin, Warrior |
| Voidwoven Corrupted Nullcore | Tier Token | Mage, Priest, Warlock |
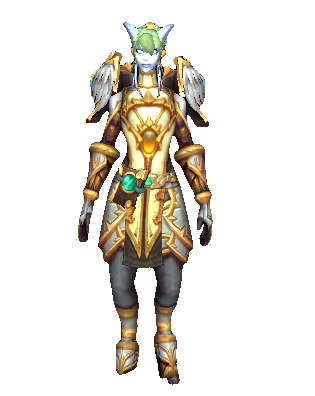
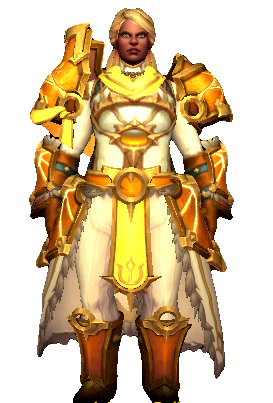
Lightblinded Vanguard
The Lightblinded Vanguard — Commander Venel Lightblood, General Amias Bellamy, and War Chaplain Senn — are fought simultaneously as a coordinated trio encounter. Each member operates on an independent energy bar and brings a fundamentally different combat style: Lightblood delivers lethal execution strikes and combat empowerments, Bellamy silences and pressures with relentless holy volleys, and Senn overwhelms healers with absorb stacks, channeled damage, and a mounted charge sequence. The fight is a continuous exercise in overlap management — their abilities interweave, their auras leave permanent consecrated zones across the floor, and on Mythic a roaming Zealous Spirit amplifies whichever member it currently inhabits.
Shared Mechanics
| Ability | Description |
|---|---|
| Aura of Wrath / Aura of Devotion / Aura of Peace | Upon reaching 100 energy, each Vanguard member radiates their respective aura for 15–25 seconds. Lightblood's Aura of Wrath increases Holy damage done by 100% for all allies. Bellamy's Aura of Devotion reduces damage taken by 75% for all allies. Senn's Aura of Peace pacifies any player who directly attacks shielded allies for 5 seconds. Upon expiration, each member consecrates the ground at their current location. |
| Divine Consecration | Consecrated ground left behind when an aura expires. Inflicts 97,126 Holy damage per second to players within it, increases all damage taken by 100%, and pacifies them. Extremely lethal on Mythic — catastrophic if placed poorly. On Heroic the damage is significantly lower. |
| Divine Shield | Any Vanguard member can become fully immune to damage and harmful effects for 8 seconds. Triggers Forbearance, preventing the same boss from using Divine Shield or Avenging Wrath for 2.5 minutes. |
| Retribution | If any Vanguard member is slain, the survivors gain 5% increased damage every 2 seconds until they avenge their fallen ally or die. Kill order and timing must account for this. |
| Zealous Spirit (Mythic) | A roaming spirit that inhabits one Vanguard member at a time for 20 seconds, increasing their damage by 30% and empowering one of their signature abilities. Upon expiration it manifests and seeks out the next member, cycling continuously throughout the fight. |
Commander Venel Lightblood
| Ability | Description |
|---|---|
| Execution Sentence | Lightblood marks several players and executes them 3 seconds later, inflicting massive Holy damage split among players within 6 yards of each marked target. Three Divine Hammers then spiral outward from each impact point, dealing 213,678 Holy damage to anyone in their path. |
| Judgment → Final Verdict | Tank combo: Judgment inflicts 233,103 Holy damage and increases Final Verdict damage by 500% for 5 seconds. Final Verdict immediately follows for 485,632 Holy damage. Requires a tank cooldown or swap. |
| Divine Storm | Lightblood unleashes a burst of Holy energy, inflicting 135,977 Holy damage to players within 8 yards. On Mythic when empowered by Zealous Spirit, spawns multiple Divine Tempests — slow-moving Holy vortexes that deal 77,701 damage per second to players within 3 yards and reduce movement speed. |
| Avenging Wrath | Lightblood becomes an avatar of holy fury, increasing his damage by 30% and his damage taken by 20% for 20 seconds. A DPS burn window — focus damage here. |
| Sacred Toll | Lightblood deems all players within 100 yards unworthy, inflicting 155,402 Holy damage to the entire raid. |
General Amias Bellamy
| Ability | Description |
|---|---|
| Divine Toll | Bellamy fires a continuous volley of holy shields every 2 seconds for 18 seconds. Each shield that connects inflicts 213,678 Holy damage and silences the struck player for 5 seconds. On Mythic when empowered, targets all players simultaneously. |
| Avenger's Shield | Bellamy hurls holy shields at several players. Each explodes on impact, dealing 116,552 Holy damage plus 31,080 Holy damage every 0.5 seconds to players within 6.5 yards of the blast. On Mythic+Zealous Spirit empowerment, targets every player. |
| Judgment → Shield of the Righteous | Tank combo mirroring Lightblood's: Judgment increases Shield of the Righteous damage by 500% for 5 seconds, immediately followed by a 485,632 Holy damage slam. |
| Light Infused | A persistent passive aura inflicting 11,655 Holy damage to all players every 2 seconds. This damage increases by 25% every time any Vanguard member triggers their aura — the fight's primary escalation mechanic. |
War Chaplain Senn
| Ability | Description |
|---|---|
| Tyr's Wrath | Every 3 seconds, Senn applies a massive 662,413 healing absorb to the 5 nearest players. Stacks with each application. Healers must burn through these shields before they compound beyond recovery. |
| Searing Radiance | Senn channels holy Light for 15 seconds, dealing 15,540 Holy damage to all players every second. On Mythic when empowered by Zealous Spirit, the damage increases by 10% every second throughout the channel. |
| Sacred Shield | Senn shields herself against all interrupts, absorbing the next 3,312,065 damage. She then mounts her elekk and charges forward (Elekk Charge, dealing Physical damage to anyone in her path), before casting the interruptible Blinding Light — a 292,036 Holy damage disorient to the entire raid if not stopped. |
| Exorcism | Senn exorcises her current tank target for 155,402 Holy damage. |
The Lightblinded Vanguard encounter is sustained chaos: three bosses acting simultaneously, each building toward their own empowerment window and each leaving permanent consecrated hazards across the floor as their auras expire. The fight's difficulty lies entirely in preventing these windows from overlapping uncontrolled.
Each member charges their energy independently. When Lightblood hits 100, Aura of Wrath doubles Holy damage output for 15 seconds — a window in which Execution Sentence and Divine Storm become significantly more lethal. When Bellamy hits 100, Aura of Devotion reduces incoming damage by 75% for allies — effectively making her nearly unkillable for 25 seconds and requiring DPS to switch off her entirely. When Senn hits 100, Aura of Peace pacifies any player who attacks her allies — DPS must immediately identify which targets are protected and avoid striking them entirely. Keeping the three bosses physically separated and moving them before each energy peak is the single most important positional discipline in the fight, as it determines where each Divine Consecration zone lands when the aura ends.
Execution Sentence is the encounter's most punishing mechanic. Marked players have 3 seconds to spread from one another and position away from the raid, while the rest of the group moves clear of Lightblood's projected consecration zone. The follow-up Divine Hammers spiral outward unpredictably and must be dodged. Tanks must be prepared with cooldowns or a swap for the Judgment → Final Verdict combo — it deals nearly 720,000 Holy damage in rapid succession and is lethal without mitigation.
Divine Toll forces the entire ranged and healer group into constant loose spread throughout its 18-second duration. Any player hit by a holy shield is silenced for 5 seconds — a healer caught in two consecutive shields effectively loses their entire healing window. Bellamy should be repositioned away from the group before she reaches full energy to ensure her eventual consecration zone doesn't land in high-traffic areas. Light Infused ticks in the background at all times and accelerates with each aura proc, building consistent chip damage that compounds with everything else.
Senn is the encounter's healer killer. Tyr's Wrath applies stacking 662,000-point absorb shields to the five nearest players every 3 seconds — healers must pour resources into clearing these or they accumulate into a healing deficit that collapses the group. Searing Radiance layers steady raid-wide damage across the top of this. Sacred Shield must be respected: while it is active Senn cannot be interrupted, so all resources shift to stopping the follow-up Blinding Light cast before it disorients the entire raid.
On Mythic, the Zealous Spirit cycles between all three bosses, empowering each in turn. When inhabiting Lightblood, Execution Sentence gains a synchronized Divine Toll from the Spirit. When inhabiting Bellamy, Avenger's Shield hits every single player at once. When inhabiting Senn, Searing Radiance's damage accelerates exponentially across the channel duration. Mythic groups must track the Spirit's current location at all times and stack cooldowns against whichever empowered ability is most threatening to their composition.
As the fight extends, auras fire more frequently, consecration zones accumulate and shrink the available arena, and Light Infused ticks harder with every cycle. The encounter is ultimately decided by four disciplines running in parallel: clean tank swap execution on every Judgment combo, healing cooldown assignments covering Tyr's Wrath and Divine Toll overlaps, DPS target swaps during Sacred Shield and Execution Sentence, and movement discipline keeping consecration zones from compounding into a room-wide wall. Groups that let any one of these slip will find the pressure spiraling beyond recovery.
Loot Table
| Item | Type | Slot |
|---|---|---|
| Tattered Vanguard Banner | Housing | — |
| Bellamy's Final Judgement | Sword | Two-Hand |
| Blade of the Blind Verdict | Sword | Main Hand |
| Blooming Barklight Spaulders | Leather | Shoulder |
| Bond of Light | Ring | Finger |
| Lightblood Greaves | Plate | Feet |
| Litany of Lightblind Wrath | Off-Hand | Off Hand |
| Voidcast Fanatical Nullcore | Tier Token | Evoker, Hunter, Shaman |
| Voidcured Fanatical Nullcore | Tier Token | Demon Hunter, Druid, Monk, Rogue |
| Voidforged Fanatical Nullcore | Tier Token | Death Knight, Paladin, Warrior |
| Voidwoven Fanatical Nullcore | Tier Token | Mage, Priest, Warlock |
| Waistcord of the Judged | Waist | |
| War Chaplain's Grips | Plate | Hands |
_preview.webp)
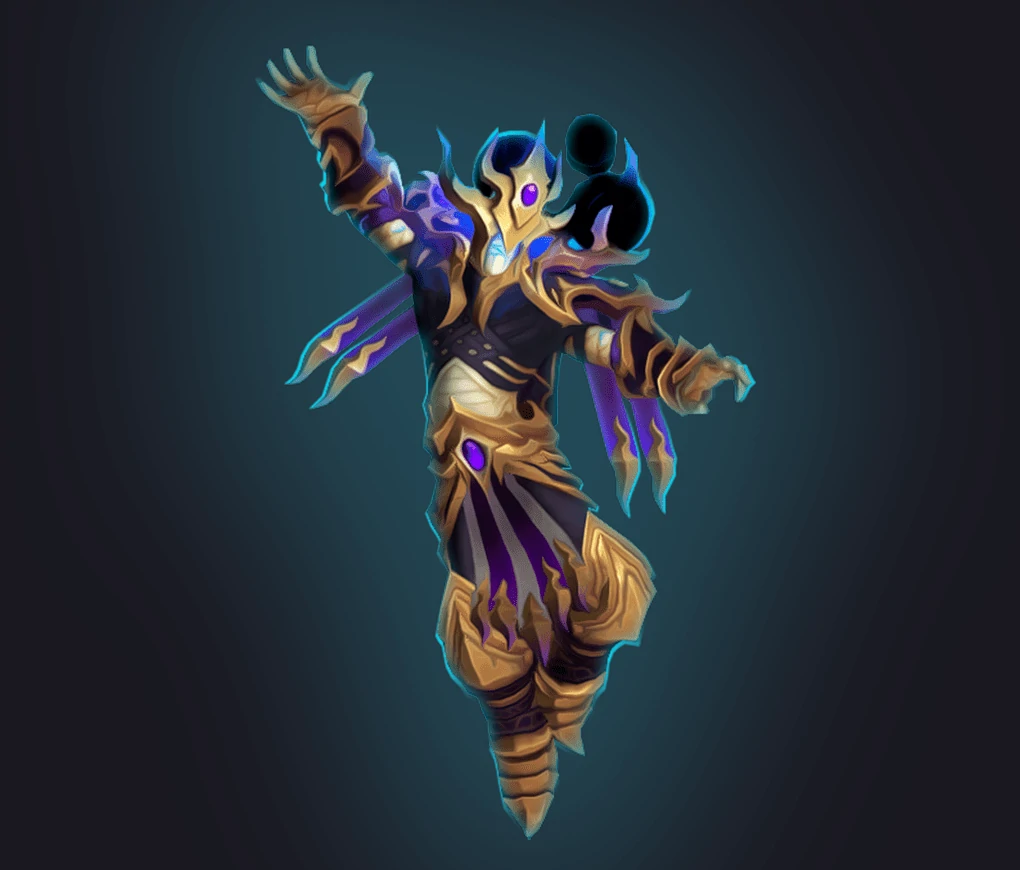
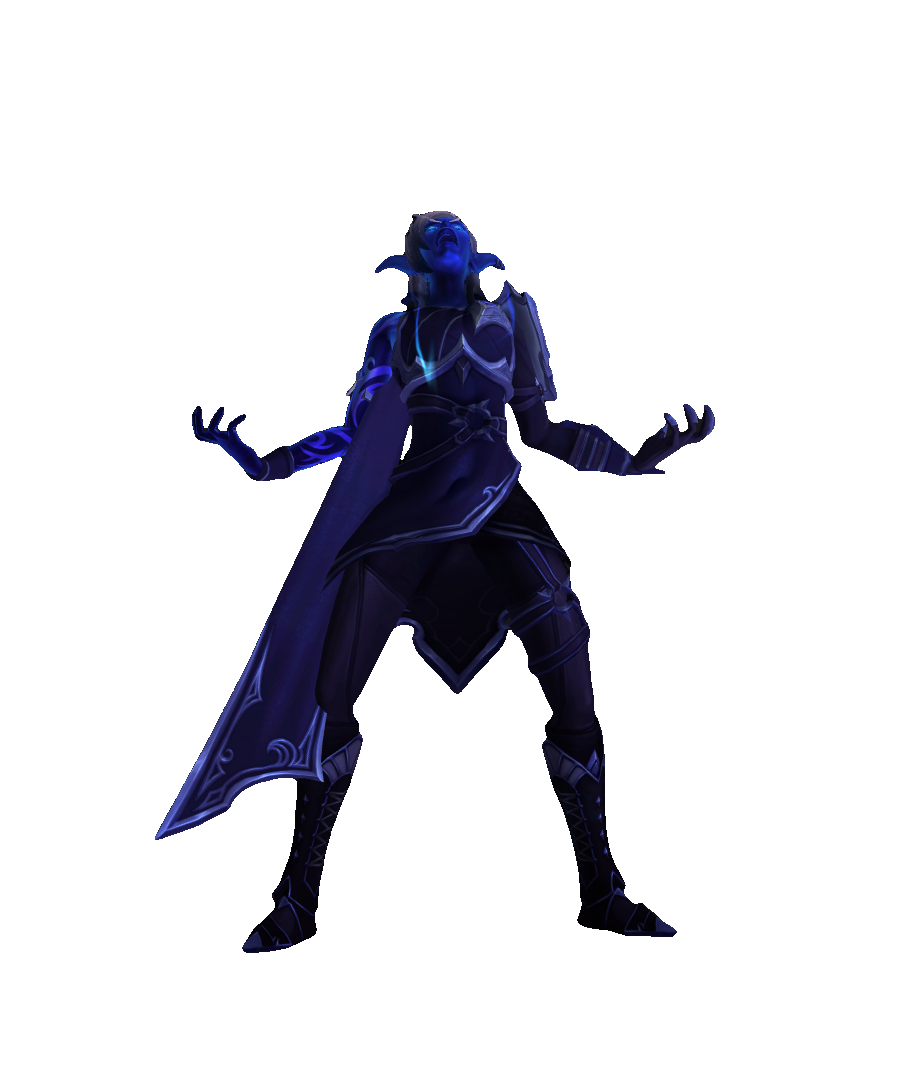
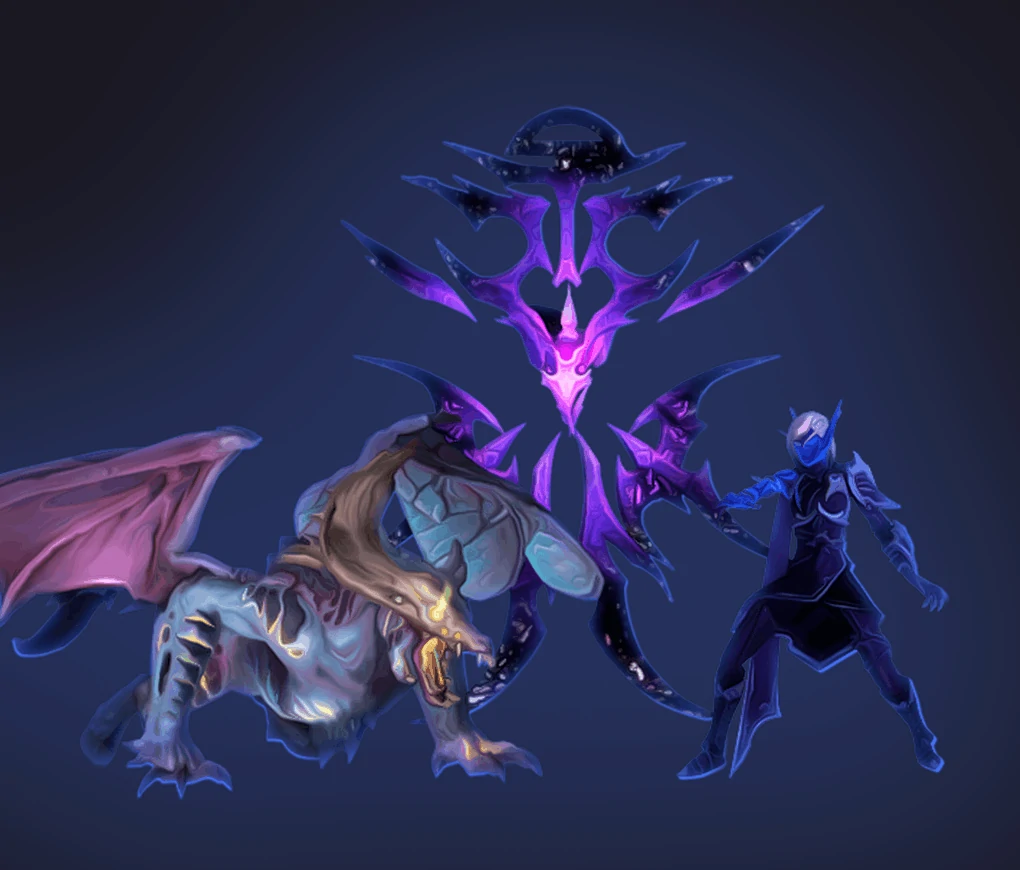
Crown of the Cosmos — Alleria Windrunner
Alleria Windrunner is the final boss of The Voidspire — a multi-stage encounter that begins with Alleria pinned in place by three Undying Sentinels and escalates through a movement-heavy intermission into a brutal two-phase burn. The fight demands constant cleansing discipline through Silverstrike Arrow, tight Sentinel tanking, surgical Null Corona healing, and complete arena control as ground hazards accumulate across every stage. This is the raid's defining execution check — the group that survives is the one that kept positioning clean from the first pull.
Stage One: The Voidspire
| Ability | Description |
|---|---|
| Silverstrike Arrow | Alleria marks a player and fires a silver-lined arrow through them in a line, dealing Arcane damage to everyone caught in its path and removing all Void effects from players and Voidspawn struck. On Mythic, hitting an Undying Sentinel applies Silver Residue — a stacking Arcane DoT that persists until the Sentinel dies and continuously strips its Void effects. |
| Grasp of Emptiness | Ancient obelisks seize a player with Void energy, dealing 58,276 Shadow damage per second and reducing movement speed by 60% for 8 seconds. Upon removal, Bursting Emptiness detonates outward from each obelisk — Shadow beams that deal 349,655 damage to any player in their path. Lanes must be kept clear before the debuff expires. |
| Void Expulsion | Alleria calls down a celestial body near a targeted player. On impact it deals raid-wide Shadow damage and leaves a persistent Void Remnants zone that inflicts 108,781 Shadow damage per second to anyone standing within it. On Heroic and Mythic, multiple players are targeted simultaneously. |
| Void Remnants | Persistent ground patches of void energy remaining after Void Expulsion impacts. These accumulate across the arena throughout the phase and progressively reduce safe movement space. |
| Null Corona | A shell of Void magic placed on a random player that absorbs 1,987,239 healing. If dispelled before being fully healed off, the remaining absorb jumps to another random player — potentially compounding onto a target already holding one. Healers must burn through this rather than dispelling. |
| Echoing Darkness | If any Undying Sentinel has no tank in melee range, it releases a dark Void wave dealing 58,276 Shadow damage to all players. On Heroic, it instead builds stacking damage done buffs on the Sentinel every 2 seconds. Tanks must maintain melee coverage on each Sentinel at all times. |
| Umbral Tether | Void magic that binds each Undying Sentinel to existence — they cannot die while this tether is active. The tether is removed through encounter progression as Alleria's Silverstrike Arrows cleanse their Void effects. |
| Corrupting Essence | Void Droplet adds explode on death, splashing the nearest players or Sentinels within range. Each splash inflicts Shadow damage and applies a 5% increased damage taken debuff that stacks. Void Droplets must be killed away from tanks and the raid. |
Undying Sentinel Unique Abilities
| Sentinel | Ability | Description |
|---|---|---|
| Morium | Dark Hand | Strikes the current tank for 971,263 Physical and 971,263 Shadow damage, knocking the target back. Requires tank swap preparation. |
| Demiar | Interrupting Tremor | Shuddering waves deal 116,552 Shadow damage to all players within 40 yards and interrupt all active spellcasts. |
| Vorelus | Ravenous Abyss | Devours the essence of players within 15 yards, dealing 174,827 Shadow damage and reducing their damage done by 70% for 8 seconds. Players must not stack near Vorelus. |
Intermission: Crushing Singularity
| Ability | Description |
|---|---|
| Silverstrike Barrage | Alleria loses control and fires silver-lined arrows chaotically in all directions, dealing Arcane damage and stripping Void effects from anyone struck. On Heroic+, each hit increases damage taken from subsequent Barrage hits by 500% for 8 seconds — stacking. Players must avoid clustering in arrow paths. |
| Stellar Emission | Raw Void energy radiates outward from Alleria every 2 seconds, dealing 7,770 Shadow damage and increasing the magnitude of all forced movement effects by 35% for 10 seconds. Stacks throughout the intermission — late stacks cause pull effects to move players dramatically farther. |
| Orbiting Matter | Stellar mass orbits around Alleria in rings, pulling any player it collides with and dealing Shadow damage. Players must track orbit paths and avoid being dragged into the center. |
| Singularity Eruption | Wild gravity pockets erupt from Alleria, dealing 75 Shadow damage and knocking away players caught within 6 yards of each impact. Combined with escalating Stellar Emission stacks, these eruptions become increasingly dangerous. |
Stage Two: The Severed Rift
| Ability | Description |
|---|---|
| Rift Simulacrum | Alleria uses her Spatial Rift to summon a void simulacrum that buffs her significantly. While within 30 yards of it, she gains stacking 10% damage reduction and 5% increased damage done per second via Empowering Darkness. The simulacrum must be tanked and burst down quickly. It spawns with a Cosmic Barrier absorb shield that pulses Shadow damage to all players while active. |
| Empowering Darkness | While the Rift Simulacrum is alive and within 30 yards, Alleria and nearby Voidspawn gain stacking damage buffs and damage reduction. Every second the simulacrum lives, Alleria becomes harder to kill. |
| Ranger Captain's Mark | Alleria marks several random players for 6 seconds. Upon expiration, she fires a Silverstrike Ricochet — a bouncing silver arrow that leaps between players, dealing 132,092 Arcane damage per bounce and removing Void effects. Marked players must spread to limit bounce overlap. |
| Voidstalker Sting | Alleria fires Void-tipped arrows at multiple players, applying a stacking Shadow DoT that persists for 25 seconds. Stacks compound with each repeat application throughout Stage Two. |
| Call of the Void | Cosmic energy bursts around Alleria, dealing area Shadow damage and summoning Undying Voidspawn adds. Each Voidspawn casts the interruptible Void Barrage, firing at random players for 93,241 Shadow damage. If a Voidspawn reaches 100 energy it enters Coalesced Form — becoming immune to CC and gaining 100% movement speed and damage permanently. |
| Void Expulsion | Continues from Stage One. Void Remnant zones accumulate on the floor throughout Stage Two as well. |
| Null Corona | Returns in Stage Two. The Rift Simulacrum also casts it. Heal through; never dispel. |
| Rift Slash | The Rift Simulacrum tank mechanic — strikes the current target for 660,459 Physical damage and reduces all their stats by 10% for 20 seconds. Stacks. Requires tank swaps or strong cooldown coverage. |
Stage Three: The End of the End
| Ability | Description |
|---|---|
| Aspect of the End | Alleria marks players with a consuming arrow that reduces healing received by 10%, growing stronger every 2 seconds until the marked player moves 30 yards away to shed it. Upon removal, triggers Gravity Collapse — knocking the target upward and increasing their Physical damage taken by 300% for 12 seconds, while dealing a raid-wide Shadow shockwave. |
| Devouring Cosmos | Alleria calls down the cosmos to consume all players caught within — dealing 20 Shadow damage per second and reducing all healing and absorbs received by 99%. Any player trapped inside is effectively unkillable by healers. |
| Grasp of Emptiness | Returns in Stage Three alongside all accumulated Void Remnants. Burst beams from obelisk removal must still be navigated in a significantly more cluttered arena. |
| Voidstalker Sting | Continues stacking from Stage Two entries. Healers face significant background Shadow damage into Stage Three. |
| Dark Rush | Cosmic feathers fallen from Alleria's quiver litter the arena. Touching one grants greatly increased movement speed but applies a Shadow damage-over-time effect for 12 seconds. |
Stage One: Sentinel Control
The fight opens with Alleria anchored by three Undying Sentinels — Morium, Demiar, and Vorelus — each tethered to a void portal and each requiring a dedicated tank in melee range at all times. Echoing Darkness fires the moment any Sentinel loses tank coverage, dealing immediate raid-wide damage and building stacking punishment on Heroic. The Sentinels cannot be killed while their Umbral Tether is active — this is removed only through Silverstrike Arrow hits gradually stripping their Void effects across the phase. On Mythic, routing the arrow through a Sentinel applies Silver Residue, steadily burning them down.
Silverstrike Arrow is both the encounter's primary cleanse tool and its most dangerous line mechanic. The marked player must step into a clear angle so the arrow travels through Sentinels without crossing the raid. Healers must prepare for the Aspect of the End healing reduction on struck players. Marked players should communicate their trajectory before moving.
Grasp of Emptiness must be removed cleanly — the targeted player should step away from clustered players so the resulting Bursting Emptiness beams fire into empty space. Void Droplets should be killed away from both tanks and the raid to prevent stacking Corrupting Essence on anyone who matters. Null Corona absorbs must be healed through — dispelling causes the shield to leap to another target, potentially stacking absorbs in the worst possible windows. Once all three Sentinels fall, Alleria destabilizes and the arena collapses into the intermission.
Intermission: Crushing Singularity
Once stabilization fails, Alleria overloads with Void and cosmic energy. The intermission is defined by stacking Stellar Emission amplifying all movement forces — early stacks are manageable, but late stacks cause Orbiting Matter pulls to launch players dramatically off their intended positions. The group must spread loosely, rotate personal defensives, and navigate Silverstrike Barrage arrow paths without clustering into the same lanes. Singularity Eruption knockbacks compound with orbital pulls when Stellar Emission stacks are high. The goal is survival and positioning maintenance until the Rift Simulacrum appears and Stage Two begins.
Stage Two: The Severed Rift
The Rift Simulacrum must be the raid's first focus whenever it spawns. Every second it lives grants Alleria stacking damage reduction and damage increase through Empowering Darkness — prolonged Simulacrum uptime makes Alleria essentially unkillable. Its Cosmic Barrier pulses raid-wide Shadow damage until broken; DPS must immediately burn through it. Tanks managing Rift Slash stat reduction stacks will need swaps or strong cooldowns to prevent their mitigation from collapsing.
Call of the Void Undying Voidspawn adds must be interrupted and killed before reaching 100 energy — a Voidspawn that completes its energy bar enters Coalesced Form and becomes an unkillable, CC-immune threat. Ranger Captain's Mark targets must spread wide before expiration to reduce Silverstrike Ricochet bounce overlap. Voidstalker Sting stacks accumulate throughout Stage Two and carry into Stage Three — healers should track total stack counts as they build.
Stage Three: The End of the End
The final stage has few new mechanics but extreme overlap of everything that came before. Aspect of the End marks players with an escalating healing reduction — they must move 30 yards to shed it cleanly, but the resulting Gravity Collapse increases their Physical damage taken by 300% for 12 seconds and slams the rest of the raid with a shockwave. Tanks and marked players must coordinate around every Gravity Collapse to ensure no one is caught under lethal damage amplification without a cooldown ready.
Devouring Cosmos zones apply 99% healing reduction to anyone inside — they are instant death zones for anyone not moving immediately. The arena at this point carries accumulated Void Remnants from every prior stage and active Volatile Fissures from Stage Two, severely constraining movement options. Voidstalker Sting stacks hit hard by this point, putting continuous pressure on healers. Personal defensive and healer cooldown rotations determine whether the group survives the final stretch. Every cooldown that was saved for Stage Three has a specific job.
Loot Table
| Item | Type | Slot |
|---|---|---|
| Arator's Swift Remembrance | Mount | — |
| Canopy Walker's Footwraps | Leather | Feet |
| Eternal Voidsong Chain | Neck | Neck |
| Gaze of the Unrestrained | Trinket | Trinket |
| Hate-Tied Waistchain | Plate | Waist |
| Locus-Walker's Ribbon | Cloth | Back |
| Nightblade's Pantaloons | Leather | Legs |
| Ranger-Captain's Iridescent Insignia | Trinket | Trinket |
| Ranger-Captain's Lethal Recurve | Bow | Ranged |
| Sunbound Breastplate | Plate | Chest |
| Turalyon's False Echo | Trinket | Trinket |
| Untethered Berserker's Grips | Hands | |
| Voidspire Vanquisher's Argent Trophy | Achievement Trophy | — |
THE VOIDSPIRE ACHIEVEMENTS: TITLES, FEATS, AND GLORY
Beyond the elite loot, conquering The Voidspire within the Voidstorm offers players a chance to earn prestigious achievements. Whether you are aiming for time-limited feats of strength or complex encounter challenges, a professional [The Voidspire raid boost] from [BuyBoost] is the most reliable way to complete your collection.
Below is a comprehensive breakdown of the achievements available in the raid:
Time-Limited & Prestigious Feats
These achievements represent the pinnacle of raiding excellence and are only available for a limited time:
-
Ahead of the Curve: Crown of the Cosmos -
Cutting Edge: Crown of the Cosmos -
Hall of Fame: Crown of the Cosmos
Mythic Difficulty Progression
Encounter-Specific Achievements
These require specific, often difficult, tactics during boss fights.
-
The Only Winning Move Is Not To Play -
Hungry Hungry Hatchlings -
It's Treason Then -
Ready, Set, Snap! -
Aura Farming -
We Will, In Fact, See It Again
General & Guild Completion
Standard achievements for clearing wings or the entire raid on various difficulties.
-
The Voidspire -
The Voidspire Guild Run Normal Heroic Mythic
To help you track your progress in the Voidstorm, we have integrated direct links into the achievement names. Whether you are chasing seasonal rewards or complex encounter triumphs, our The Voidspire raid boost at BuyBoost is the most reliable way to secure these prestigious accolades.
CONCLUSION: A NEW ERA OF RAIDING AWAITS
The Voidspire is more than just a fortress; it is a breathtaking gauntlet that sets a high bar for the Midnight expansion. From the lower reaches controlled by Imperator Averzian to the cosmic heights where you face [Crown of the Cosmos] Alleria Windrunner, players are in for an unforgettable journey. These six magnificent bosses, each uniquely twisted by the chaotic energies of the Voidstorm, will challenge your strategy, coordination, and resolve like never before.
Whether you are here for the intricate lore of the ancient void elves or the top-tier Mythic rewards, this raid promises an epic experience. Don't let the crushing difficulty of the Void hold you back—secure your The Voidspire raid boost today. With BuyBoost, you can conquer the spire’s summit, claim your prestigious achievements, and stand among the legends of Azeroth without the stress of endless wipes.
The Spire is calling. Will you master the Void, or be consumed by it?
POPULAR NEWS


